


Front and Rear Brake Disk Removal
Brake discs are removed mainly when they are damaged or worn out and need to be replaced. It’s also one thing I have done to be extra careful when replacing tires. I suggest that you mark all parts fasteners, bolts and bolt holes so they can be reinstalled exactly as they were removed. This will maintain wheel balance and established wear pattern.
Tools:
wheel chock (optional)
Sharpie marker
6mm hex tool
3 inch extension
ratchet
new rotor gaskets
nonpermanent thread locking agent
torque wrench
Removal
1. Use a Sharpie marker to mark all bolts to their bolt holes in the wheel and both front rotors right to right and left to left for exact reinstallation. Also mark the sides of the rotors that face out so none will be reinstalled in reverse.
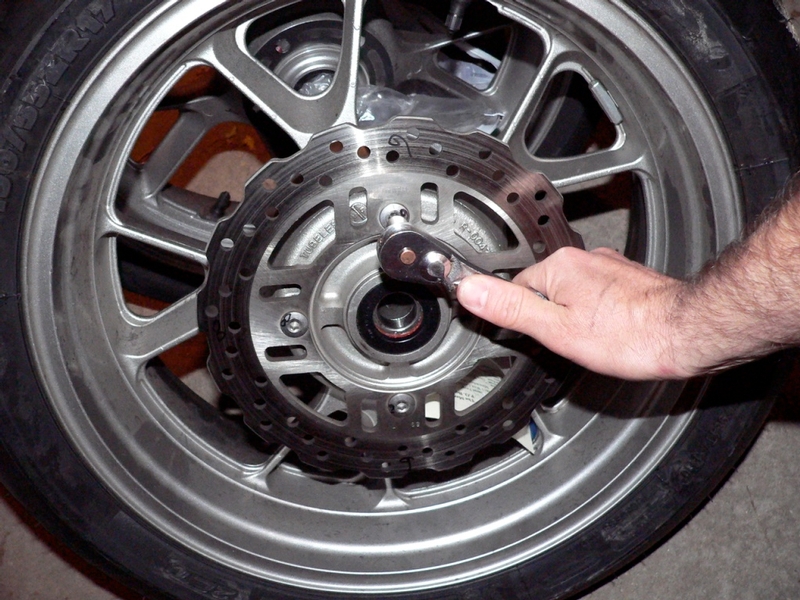
2. Be careful to lever the wrench at a safe angle so you do not roll or lift the bike off the side stand. Use a 6mm hex tool, 3 inch extension and a ratchet to break free all rotor bolts with the wheels on the ground.
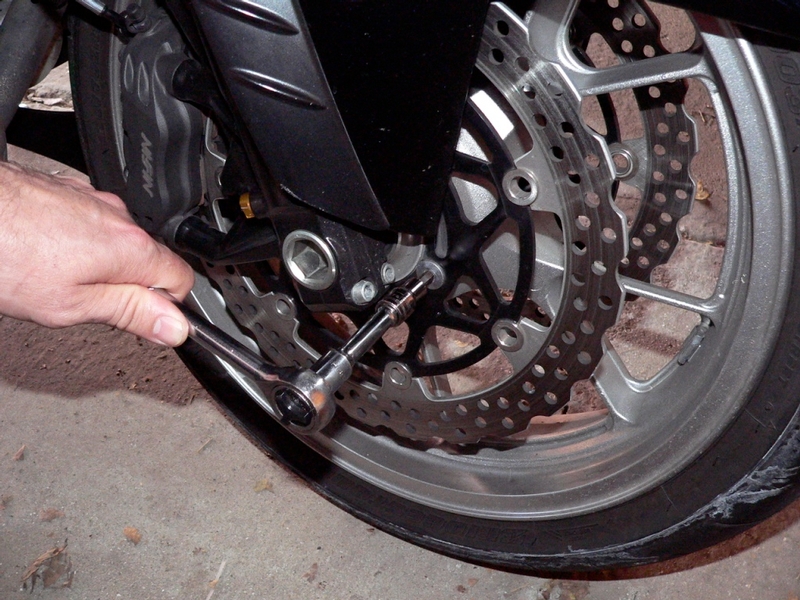
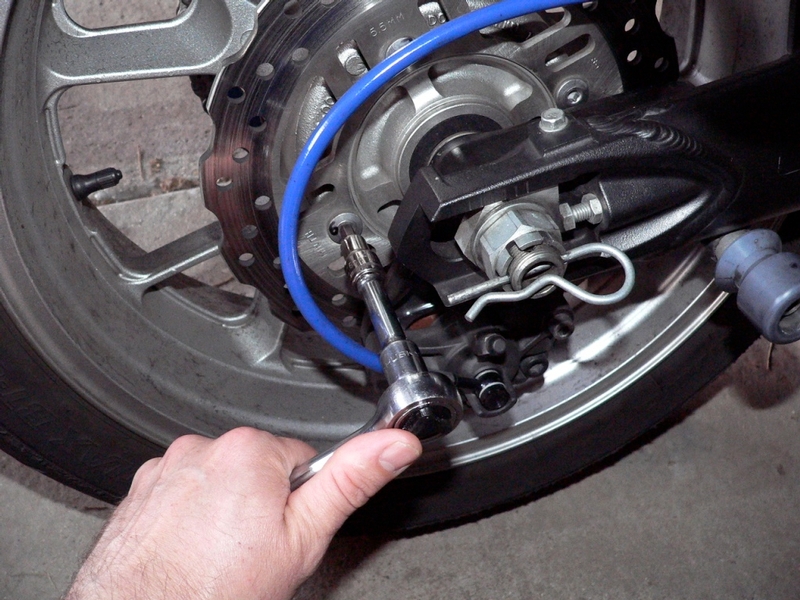
Rotor bolts can be hard to break loose. They have thread locking agent applied to them and they are torqued. Be careful not to strip the hex. You can leave the rear wheel on the floor to break the bolts free. Whichever procedure you use, be very careful to not lever the bike over.
3. Remove the front and rear wheel (see Wheel Removal, steps 1 through 7 and steps 20 through 30).
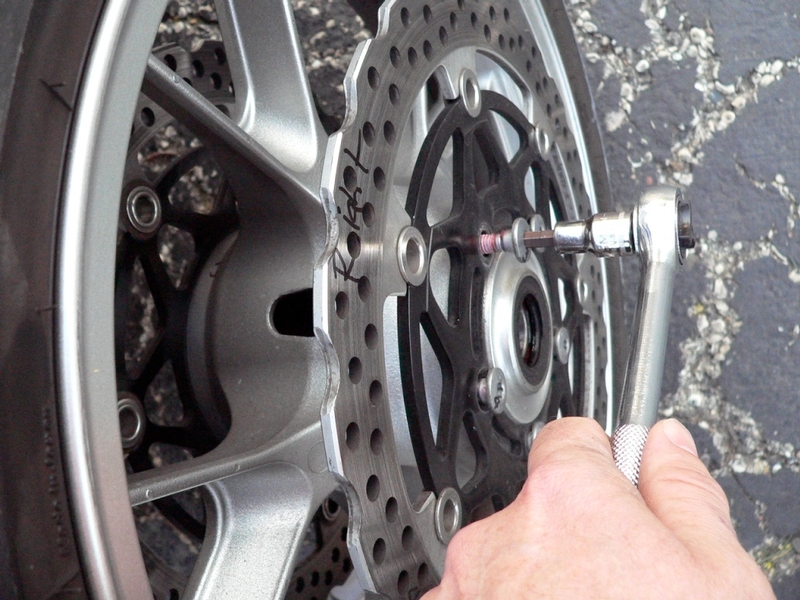
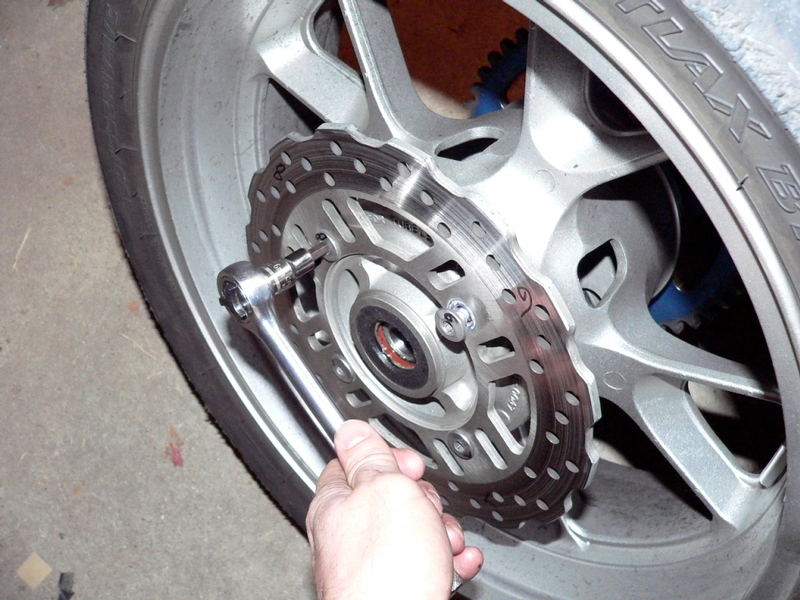
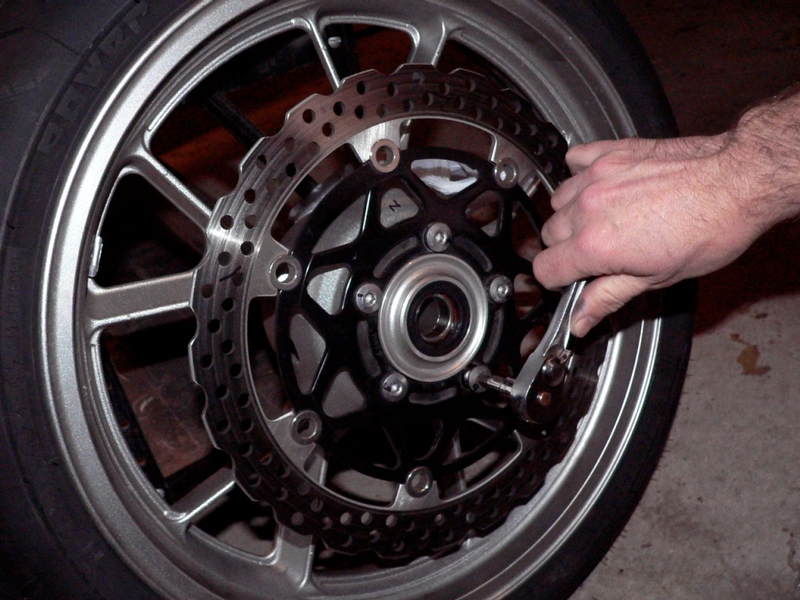
4. Remove the rotor bolts from the front and rear wheels.
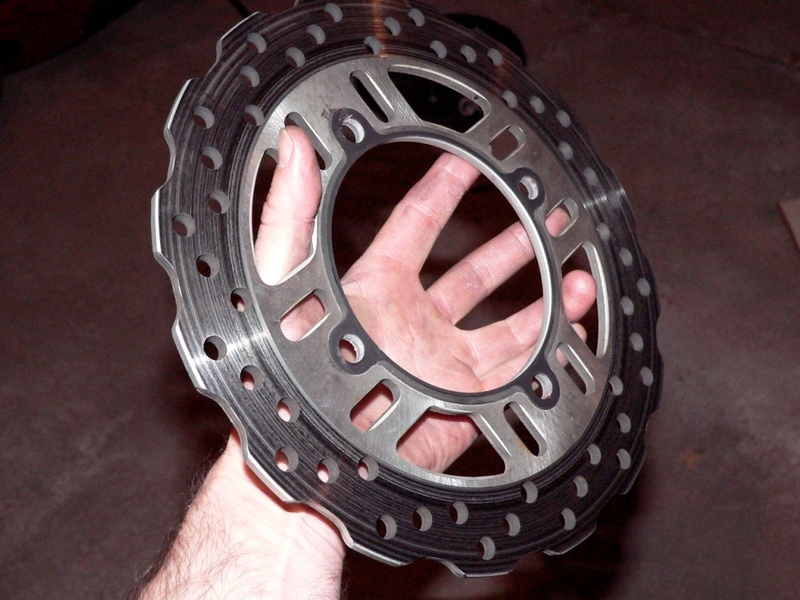
Remove the rotor being careful to not drop it.
The rotor gaskets are supposed to be replaced if the rotors are removed.
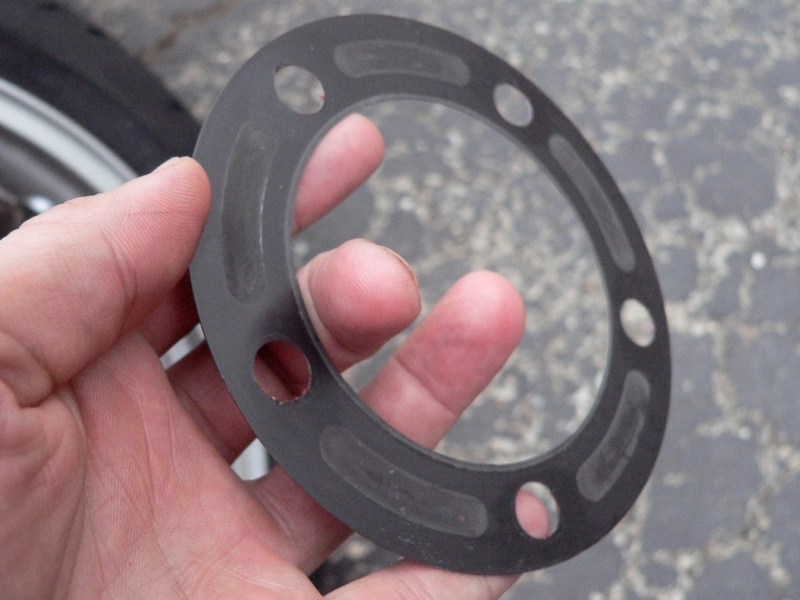
There should be no problem reusing a rotor gasket a few timers as long as it is not cracked.

Just leave the rotor gasket in place if it sticks to the rotor or wheel and you would like to reuse it.
The rear rotor gasket is delicate.
Installation
5. Install new rotor gaskets, front and rear if you are replacing them.
Aligning the marked rotor bolt holes to the marks on the wheel, match the rotors left to left, right to right and with the proper side facing out.
Use nonpermanent threadlocking agent on the rotor bolts and install the rotors, snugging them up evenly according to how they were marked to the bolt holes in the wheel.
6. Draw up all front rotor bolts evenly.
Draw up all rear rotor bolts evenly
7. Install the wheels to the bike (see Wheel Removal, steps 10 through 19 and steps 33 through 44).
8. Apply non-permanent thread locking agent to front and rear rotor bolts.
Tighten the rotor bolts evenly with a torque wrench.
Torque - front disk mounting bolts: 20 ft pounds.
Torque - rear disk mounting bolts: 20 ft pounds.
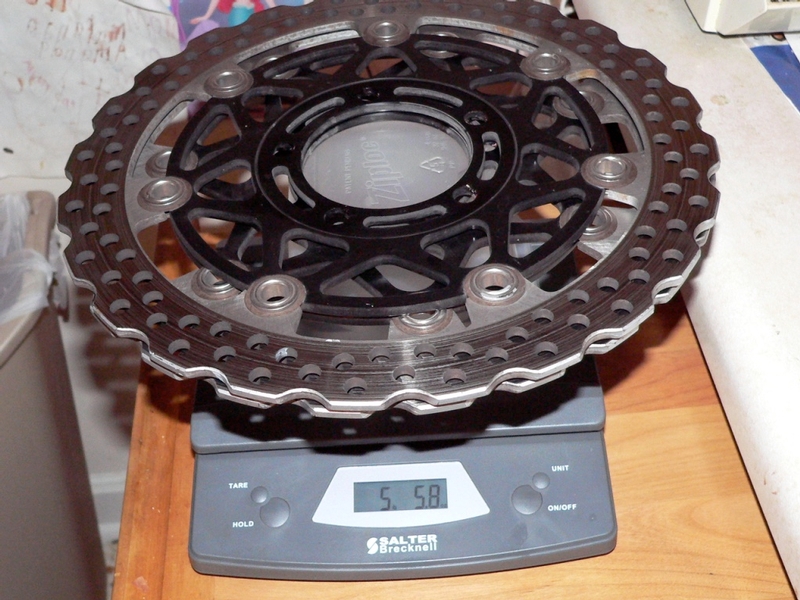
Parts Weight
Front OEM Rotors, 5 lbs, 5.8 oz
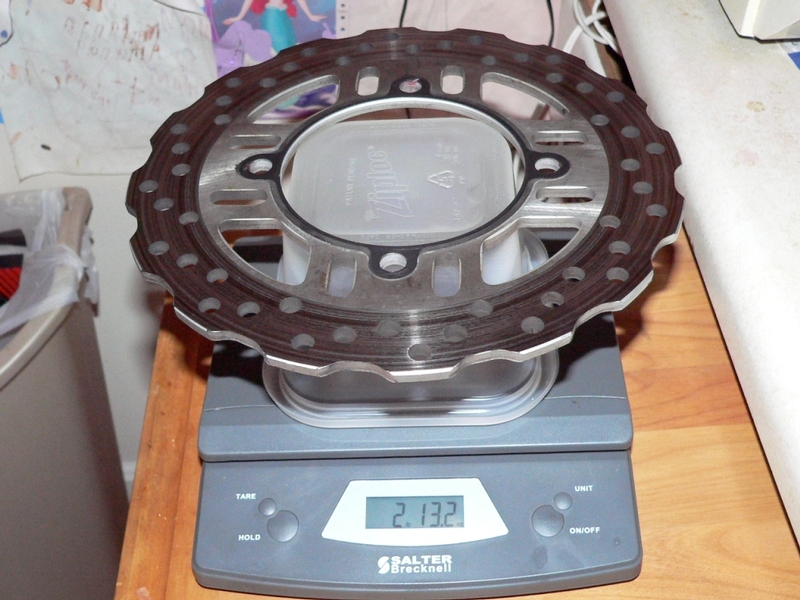
Rear OEM rotor, 2 lbs, 13.2 oz
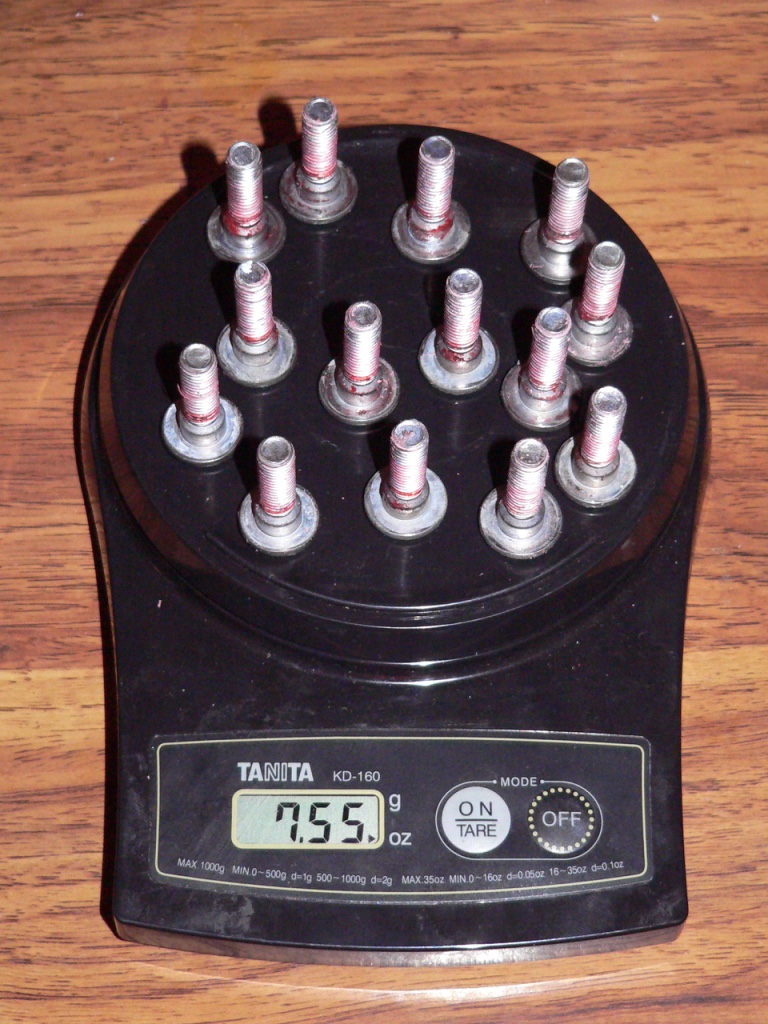
Front and rear OEM rotor bolts, 7.55 oz
Total OEM weight, 8 lbs, 10.55 oz
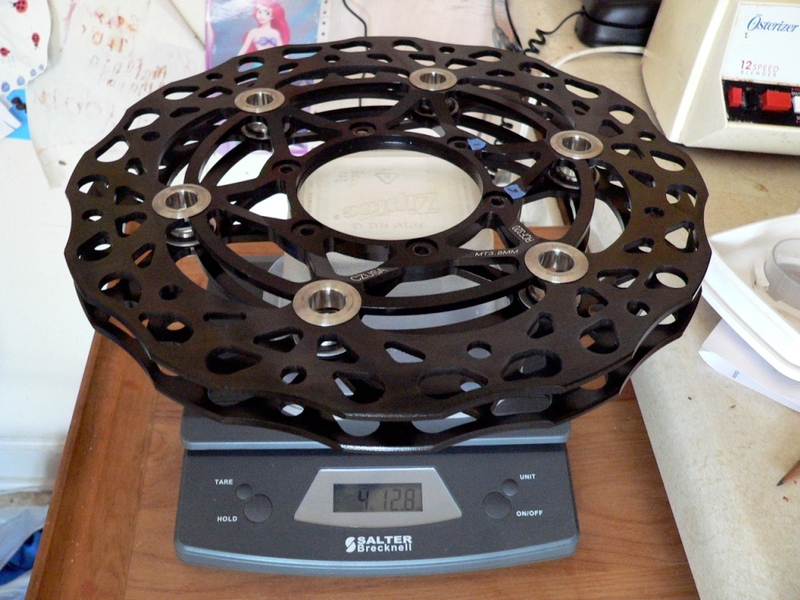
Front Carrazzeria 13 inch rotors. The bolt pattern is for a Carrazzeria rim but just for comparison, 4 lbs, 12.8 oz
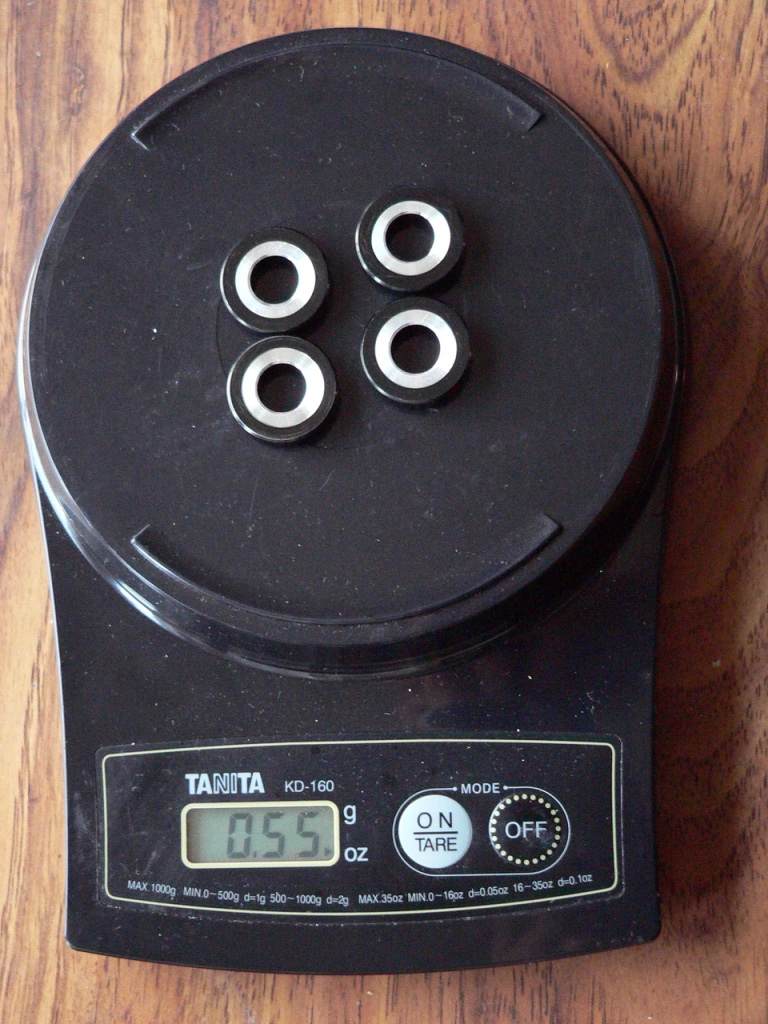
Caliper spacers to accommodate 13 inch rotors, .55 oz
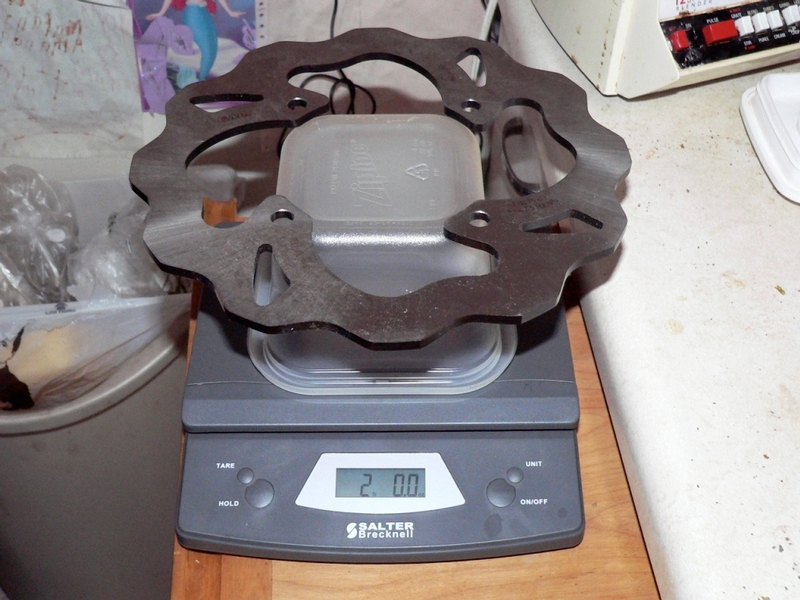
Galfer rear rotor, 2 lbs, 0.0 oz
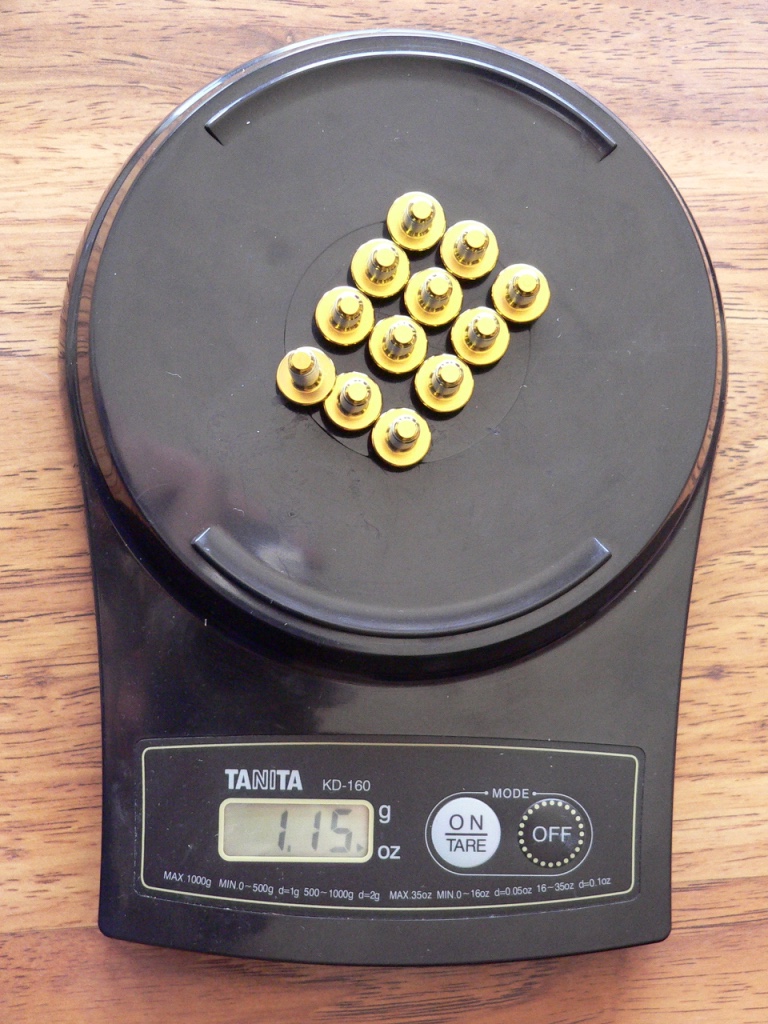
Probolts m6 x 1.0 x 12 mm Ti steal flanged hex head screws for front rotor bolts, 1.15 oz
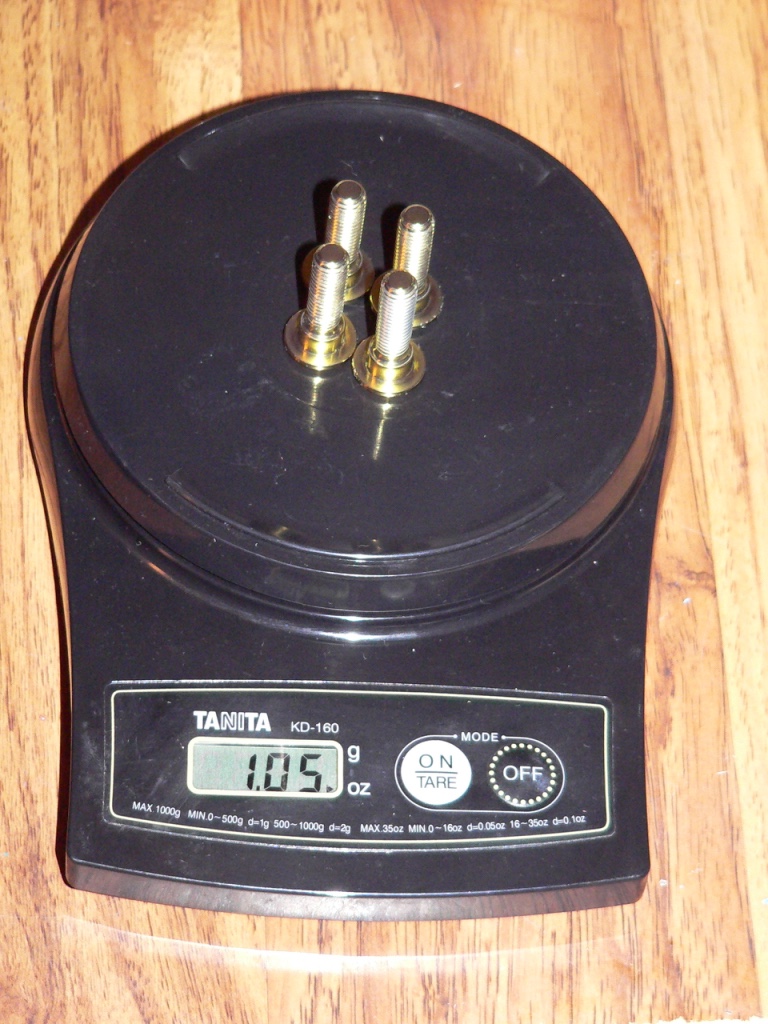
Probolts Ti steal rear rotor bolts, 1.05 oz
Total aftermarket parts, 6 lbs, 14.55 oz
NET WEIGHT REDUCTION, 1 lb, 12.8 oz
* Last updated by: Rook on 12/3/2017 @ 9:16 AM *