Move Close
Welcome to zx14ninjaform.com!

You are not logged in.
New Topic Reply
Next Page

Page: 1 2 3 4 5 6

Previous Page

Thread: how-to for throttle body sync?

Created on: 03/13/14 06:19 PM

Replies: 125

Hub


Hub's Gravatar

Joined: 02/05/09

Posts: 13719

RE: how-to for throttle body sync?
10/03/15 12:07 AM

Good question. I don't know? I'd have to try that. The 1/4 out was safe enough for me on my 1352. The 1441 comes without idle cable so if I mess with the idle screws, does the idle relearn if the lows are screwed with? Only my AFR knows for sure.


Tormenting the motorcycling community one post at a time

Link | Top | Bottom

Rook


Rook's Gravatar

Joined: 03/28/09

Posts: 20592

RE: how-to for throttle body sync?
10/03/15 9:39 AM

...guess so. More and more, the ECU is taking over the bikes today. I doubt the wrench will ever be totally obsolete but the more high-tech road is the flash.

I would assume that if the vacuums were measured with a gauge to 90, 69, 72 and 95, one would be safe to bring them all up to the highest vacuum which was 95. So then you have 95, 95, 95 and 95. If 95 was not running lean on the highest cylinder before the sync, it should be safe to bring the lows up to 95 as well--ya think? Then you could go one step further and boost all up to 100 but I don't think I would go there without seeing what was happening with my AFRs.


'08 MIDNIGHT SAPPHIRE BLUE Now Deceased

Link | Top | Bottom

Rook


Rook's Gravatar

Joined: 03/28/09

Posts: 20592

RE: how-to for throttle body sync?
10/03/15 5:54 PM

well, Hub I'm about to take marco's lead and give up on this BS. The SyncPro ........I have less confidence in it the more I use it. I don't really want to spend the time here trying to explain but looks very suspicious to me.

dinkPro
tittyVac
Pitpussy

I've had bad luck with motorcycle tools lately.

The center screw, I can't seem to get a good bite on it with a phillips or straight slot. Adjusted #4 bypass about half a turn and no change in my vacuum at all according to the dinkPro. [EDIT: that was because it was already all the way open. Openning it more will not let any more air in if it's already screwed out far enough. probably a built in safeguard against the screw falling out. No reason to turn the screw past full open.]

I did hear the idle increase and the tach was running a bit faster. This was lot of GD work. I'm feeling pretty dejected.


* Last updated by: Rook on 10/17/2015 @ 6:28 PM *


'08 MIDNIGHT SAPPHIRE BLUE Now Deceased

Link | Top | Bottom

Rook


Rook's Gravatar

Joined: 03/28/09

Posts: 20592

RE: how-to for throttle body sync?
10/04/15 1:09 PM

I guess I have about all the info I can get on this. I'm just posting my thoughts from here on in. My computer is I the shop and I cannot write this in my tutorial draft I have going. I'm getting this fucker done whatever way I can with what I have. I will be able to refer back to this when I write up the tutorial and hopefully the details will help others who choose to go through this ordeal. Feel free to post comments or shift topic if you need to.

Succeeded in getting a 2" small phillips bit from a screwdiver set to break the center adjuster screw. I believe a standard #2 bit is too large. The tension spring on that center screw is quite strong. If you press hard to seat the bit in the X, the actuator will rotate opening the throttle. If the bikes running, could suck up your mano fluid so be careful about how hard you press. [EDIT: The vacuum decreases when the throttle opens so no danger of sucking fluid out. It is however very nerve racking to have the engine running the whole time you are trying to figure out how to seat the screwdriver. I turned the motor off between the initial adjustments. I let it run for the final adjustments because I had the technique down better for turning the screws.]


You need to lay a small mirror under the center screw and place a penlight in from the LH side of the bike. [EDIT: also need to tape the mirror in place because it vibes around a lot. I taped the mirror handle to the main wire bundle on the LH side.]

Also insert the pilot screwdriver from the LH side of the bike. PRACTISE this until you get how to do it. YOu will not want to go at this the first time with the bike running. It will require some time to get the knack of how to seat the bit. You will need to note what orientation the X is in the screw and set your driver at the same orientation to start. Don't be afraid to turn that center screw a little in practice without the bike running. As long as you can see it in the mirror, you can turn it back to where it was. Free that screw up so it's ready to go when you do the adjustment. Use the mirror and know exactly where it needs to be placed. Also, find the ideal spot for the penlight. Practice how to do this so when you do the actual job, you can just get it done without frustration. It's not easy.

Center adjuster screw problem solved. Now I am off to the auto supply for some extra rubber hose to see if I can come up with a process to make calibrating and using the SyncPro more practical. The test nipples are not easy to reach. I would rather have them installed to the nipples in advance instead of using them to calibrate the mano.


* Last updated by: Rook on 10/17/2015 @ 6:35 PM *


'08 MIDNIGHT SAPPHIRE BLUE Now Deceased

Link | Top | Bottom

Rook


Rook's Gravatar

Joined: 03/28/09

Posts: 20592

RE: how-to for throttle body sync?
10/05/15 12:15 PM

I picked up 8 feet of small rubber line for about $9. Cut it to four equal lengths for calibration hoses and connected from manometer to calibration manifold (union). All 4 test fittings on Tbodies were set up, caps off, test hoses on with ends plugged. One of the test hoses was connected to the calibration manifold. This setup worked good for calibration and all the test hoses were in place to immediately start the sync.

The fluid in the syncPro is fine as long as the bike runs but as soon as you shut it down, most of the fluid drains back to the reservoirs leaving behind drops in the tubes separated by gaps of air. this completely disrupts the calibration of the manometer when you restart the engine and it is impossible to read correctly. I noticed that there appears to be alternating sections of dark and light blue fluid in the columns after the bike runs for several minutes. I believe the vibration is causing separation of the fluid. Whatever is in the fluid that inhibits it from collecting in drops is probably not remaining dispersed when the liquid is exposed to prolonged vibration. Introducing some type of additive like glycerin or alcohol may improve the drainage of the fluid but I'm not about to start experimenting with that. The best solution seems to be to shut the bike down while making adjustments then restart it to view the fluid columns. If that does not work, the only thing that can be done is to completely disassemble the SyncPro and force the fluid and air gaps trapped in the tubes back to the reservoirs. Then you start the whole calibration process over.[EDIT: Air gaps are almost inevitable with the Syn-Pro. The easiest way to deal with it is to disconnect the hoses and wave the Sync-pro like a thermometer. It is not necessary to change the calibration. All of the fluid drops will be pulled to the reservors and you can resume with your adjustments.]


* Last updated by: Rook on 10/17/2015 @ 6:38 PM *


'08 MIDNIGHT SAPPHIRE BLUE Now Deceased

Link | Top | Bottom

Grn14


Grn14's Gravatar

Location: Montana

Joined: 02/25/09

Posts: 15511

RE: how-to for throttle body sync?
10/05/15 1:56 PM

You know...I looked in the manual for this procedure.I KNOW these are done without removing 'things' from the motor(in a shop?).But the manual says to REMOVE the throttlebodies to hook up the vacuum guage...and also about unplugging that airbox tube,and closing that airbox hole off before doing the synch.Then to reinstall the throttlebodies temporarily for the engine run and all that.Is this actually necessary on this bike?Removing those parts?IDK.Sounds VERY time consuming and possibly damaging to the mating surfaces and such.Is this what a shop would do?Plus you have to reconnect the rubber throttle tubes back in there and all...surely there's a work around for all this stuff?

These 'tools' you get..the drivers and all...are these designed to allow access to the parts without removing things?I have a set and wrench for the screw adjustments with this.These will work okay without taking stuff off?

Honestly...it's pretty elaborate how they're showing this in the manual..although the overall procedure is straightforward...to get all the vacuums equal.

I haven't synched mine because it really sounds like a small nightmare to do this.


* Last updated by: Grn14 on 10/5/2015 @ 1:58 PM *

Link | Top | Bottom

Rook


Rook's Gravatar

Joined: 03/28/09

Posts: 20592

RE: how-to for throttle body sync?
10/05/15 8:06 PM

I haven't synched mine because it really sounds like a small nightmare to do this.

...and the very reason I never attempted it back when it was supposed to be due.

The Gen2 has a dif Tbody setup, I believe. From what I've been told, the Gen2 lacks the center screw that can be used to adjust the angle of the throttle plates. This to me seems like an improvement. If the bypass valves alone have enough latitude to balance all 4 Tbodies, I see no reason to go messing with the plates angle. ....but that's only what I've been told. I don't have the gen2 or the gen2 service manual.

You know...I looked in the manual for this procedure.I KNOW these are done without removing 'things' from the motor(in a shop?).

Can't speak for the gen2 but the Gen1 requires that the following be removed to reach all four bypass screws.
1)engine ground wires from the RH side by the battery box (unless you find bending the wires out of shape acceptable---might work).
2) Crankshaft sensor/Tbody subharness connectors. You cant see thrugh them--they are right in the way PLUS...
3) the crankshaft sensor connectors bracket is direstly in front of bypass screw #4. If you need to adjust that one you need to get the bracket out the way. I grabbed it and bent it out a cm or so which is how Kaw should have designed it in the first place if they were going to put a bracket in such a fucked up location.
4) The whole damned Tbody subharness that runs diagonally behind the Tbodies obstructs by pass #3 and #4. Might as well remove that from its two mounting points or else try forcing the screwdriver under it (as if it was not hard enough to get the bit into the screw slots already).

Removing all that crap, I can get on all the screws after a good deal of looking with mirror and penlight and practicing.

But the manual says to REMOVE the throttlebodies to hook up the vacuum guage

Maybe for the gen2 cuz you guys have almost no room under the airbox, I understand. It's hard with the Gen1 but I was able to get all the caps off the test fittings and put the hoses on. That was the least of my worries.

...and also about unplugging that airbox tube,and closing that airbox hole off before doing the synch.

Oh YES!! Forgot to mention that. I have my PAIR removed so need to do this to my bike but if you got a PAIR, gotta remove the clean air pipe and block the holes.

Then to reinstall the throttlebodies temporarily for the engine run and all that.Is this actually necessary on this bike?Removing those parts?IDK.Sounds VERY time consuming and possibly damaging to the mating surfaces and such.
I don't think that it would be necessary to remove the Tbodies......I hope not. Vic got his gen2 synced without removal.

Is this what a shop would do?
No. They wouldn't do anything and tell you they did. ..or if they were honest, they would tell you it's too much work to bother with or they would tell you they got it as good as they could but not perfect. Kruz was telling me the other night he knows a guy who does all this shit and he says it is very labor intensive and not worth it but he can do it and hates every second of it.

These 'tools' you get..the drivers and all...are these designed to allow access to the parts without removing things?
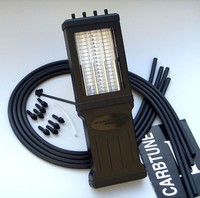
NO. The driver will reach around a corner but if you have parts with 2cm or less clearance, the MP driver is not that small to fit....so you remove or you pry and bend and hope you don't strip screws. ...at least with the gen1. The rubber tubes are no problem provided you can reach the test nipples and pull the caps off. Not necessary to remove the steel spring retainers, just twist and pull cap off. If you drop, the spring retainer will stick to a magnet very well but without, you have solid rubber and a magnet will be of no help. Oh--throw that SyncPro in the trash. Maybe it works better on smaller engines with less volume and less vacuum but it is just a never ending hassle with the 14. Vacuum gauges would be much to simple to bother with this SynPro which has turned out to be half the nightmare in itself.

I haven't synched mine because it really sounds like a small nightmare to do this.

When/if I get the tutorial done, the first thing I will say is "YOU REALLY DON"T NEED TO DO THIS UNLESS YOU ARE ONE WHO LOVES THE SOUND OF A PERFECTLY SMOOTH IDLE." I really do not believe there is going to be any improvement for racing or sport riding. Anything above an idle and the engine will be sucking so hard, anything you do to the bypass valves or a small adjustment to the angle of the throttle plates won't mean anything. The sync is for a smooth idle and small throttle openings at low rpm (cruising about town). JMHO. I have not had the opportunity to test it yet but I'm just using the ol noodle. Hub will argue this one but based on the little I know, a sync is not going to produce a big improvement in performance.

Thanks for chiming in Greenie. Good to know someone is following along with me through this small nightmare.

Welcome to my NIGHTMAAAAAAAAAAAAAAAARE.

I think you're gonna like it.

I think you're gonna feeeeeeeeeeeeeeel right at hoooooooooooooooooome.

SO--definitely got the damned center screw to turn tonight. The driver bit will slip a time or two but someties it will turn the screw. forget about counting the clicks on the handle of the driver. You don't always know if the screw turned or if the bit slipped. ALSO, you do need to press that bit in hard enough that the actuator might just turn openning the throttle to about 50%. I would suggest shutting the bike down before you adjust and then turn it back on to check what happened to the balance.

Not a lot of time to work on this today. hopefully I'll get somewhere tomorrow but need to winterize the camp so probably not much wrenching time.

...until tomorrow night (what is this now, day 5, day 6??),

yours truly,


Rook


* Last updated by: Rook on 10/5/2015 @ 8:13 PM *


'08 MIDNIGHT SAPPHIRE BLUE Now Deceased

Link | Top | Bottom

Rook


Rook's Gravatar

Joined: 03/28/09

Posts: 20592

RE: how-to for throttle body sync?
10/06/15 10:30 AM

DON'T BOTHER WITH THE SYNCPRO. It simply doesn't work. It cannot work. It is not possible to use it unless you calibrate it and to calibrate it you must connect it to the bike and then disconnect it. When you disconnect it, the fluid drops leaving residual fluid stuc to the inside of the tubes. This collects into drops which stick in the tube with air gaps between. These drops and air gaps completely disrupt the calibration. I'm done with this thing. I will try to buy a set of vacuum gauges locally or online.

Anyone want to buy a SyncPro? $40 shipped + 1.5 bottles of mano fluid.

[EDIT: The Sync-Pro works. You just have to shake it down like a thermometer if drops collect in the tubes. Vacuum gauges much more highly recommended but the SyncPro will work for you.]


* Last updated by: Rook on 10/17/2015 @ 6:42 PM *


'08 MIDNIGHT SAPPHIRE BLUE Now Deceased

Link | Top | Bottom

mebgardner


mebgardner's Gravatar

Location: Tucson, AZ

Joined: 05/08/12

Posts: 738

RE: how-to for throttle body sync?
10/07/15 8:41 AM

Good to know someone is following along with me through this small nightmare.

We're here for ya, Rook.


2012 Blue ZX-14R, Cox rad guard, Skene Design P3 Lighting, Knight Design 1" lowering pegs, Grip Puppies, BrakeAway, Cortech Sport tailbag, GSG MotoTech Frame sliders, Stebel Compact horn.

Link | Top | Bottom

Grn14


Grn14's Gravatar

Location: Montana

Joined: 02/25/09

Posts: 15511

RE: how-to for throttle body sync?
10/07/15 11:24 AM

Hell...I've got a brand new one!Never been used.Wonder if this deal would work on my H2?Course,there's ZERO room to do anything like attaching lines and such.

Link | Top | Bottom

Rook


Rook's Gravatar

Joined: 03/28/09

Posts: 20592

RE: how-to for throttle body sync?
10/07/15 11:30 AM

Thanks, meb. Stay tuned. The BNA carb sync gauges I bought on Amazon for $70 (20 less than a SyncPro manometer) will be here Oct 13-15.

COMPARING VACUUM GAUGE TOOLS
On that note, I compared reviews and photos of the 3 reasonably priced sync gauges you will find online. The EMCO seems to be the most popular. At least that is the one I have seen the most in ads and the few tutorials/posts I have read over the years. It seems to be a very well liked item that can be zeroed, calibrated and relies on plastic stepdown tubes to reduce needle flutter. The gauges have a rang of 0-30 Cm/Hg which I believe is adequate for the 14 but check the SM for max vacuum spec. One nice thing about having a smaller range is that the gauge should be easier to read more accurately. The EMCO also can measure pressure. It goes for about $90 but I see it now for $75 on Amazon. Drawback, it does not come with a storage case.

There is also a very nice chromed set of gauges (no name brand) you will find on Amazon and other places for about $130. It's a beautiful set of gauges that have all the features of the EMCO but it has adjustable needle valves to dampen needle flutter instead of stepdown tubes. These gauges are for vacuum only. They do not have a PSI scale and this could well be a big plus as far as accuracy/sesitivity of the springs inside the gauge. The drawback with these gauges is the price and the fact that the faces are marked in units of 5 in/Hg with no finer increments between the marks and no metric scale. This tool comes with a good assortment of adapters, none of which you would need for the 14.

The ABN vacuum sync tool comes with a storage case like the chromies and it has the adjustable needle valve dampeners. It also has a similar assortment of adapters that the chromes have. The range of the gauges is 0-30 cm/Hg and it has a two way spring inside capable of measuring pressure and vacuum like the EMCO. The price is the clincher. $69.

The chromies are possibly the most accurate but not the easiest to read without guesswork and metric conversion. The EMCO and ABN will probably be easier to read. The small increments should be helpful. The price of the ABN is very nice and always like to have a storage case. I bet all 3 of these are very similar in use-ability. I saw the same 3 tools on Amazon years ago and recall a thread where some owners were trying the various ones. The guy who got the one with the case thought his was the shit and so did the guy who got the chromies and so did the guy with the good ol EMCO. They all should be fine. Buy for price. Spend on a digital unit if you want something that is really awesome.

Actually, none of these are going to be extremely accurate for reading to the exact mm/Hg. The scale is not big enough on any of them to indicate such small increments. I plan to get a single port digital manometer at some point to measure the vacuum of individual Tbodies. That should be useful for getting a perfect sync after a close balance is established using an analog 4 gauge tool. I hear the digital manometers can have a built in tachometer function that counts engine pulses. Thst would be nice for an exact sync. I'm sure there are 4 port digital tools but I see the single ports are over $100 already.


* Last updated by: Rook on 10/7/2015 @ 12:13 PM *


'08 MIDNIGHT SAPPHIRE BLUE Now Deceased

Link | Top | Bottom

Rook


Rook's Gravatar

Joined: 03/28/09

Posts: 20592

RE: how-to for throttle body sync?
10/07/15 11:40 AM

Hell...I've got a brand new one!Never been used.Wonder if this deal would work on my H2?

As far as I can see, you'll have this problem no matter what bike you use it on. You will always need to calibrate it first. The only thing that might be better is that some bikes have adjusters that are very easy to reach so there is a good chance you might get right to the sync after calibrating the first time. I have a hunch frequent fluid changes would make the thing work better. The fluid seems to separate a little (as I told you on the phone --will show pics eventually)......but who wants to change expensive fluid all the time when you can get gauges for cheaper and never need to change fluid? Get one of the above.

One thing I am starting to see is that a manometer SHOULD be capable of a more perfect balance than gauges. Yes, I see now, comparing these 4 gauges will get you real , real close but reading four 5" high columns would be a lot better...if you could get the fukin thing to work.

Best of both worlds, get a digital 4 port sync tool. Gonna cost you $500 I'll bet but you'll have it all.


* Last updated by: Rook on 10/7/2015 @ 12:17 PM *


'08 MIDNIGHT SAPPHIRE BLUE Now Deceased

Link | Top | Bottom

hagrid


hagrid's Gravatar

Location: pittsburgh

Joined: 02/16/12

Posts: 2210

RE: how-to for throttle body sync?
10/07/15 6:25 PM

Rook: I have the Motion Pro 4 column tool with the blue glycerin, and like you, I managed to get bubbles in the columns.

The bubbles form from forcing the fluid to traverse the capillary tubes too quickly. I've found this is caused by yanking the vacuum tube(s) off the spigots while the engine is idling or by allowing the engine to rev and the closing the throttle, causing an unnaturally high vacuum condition.

To prevent bubbles:

1) don't rev the engine and then close the throttle.
2) don't suddenly deprive the manometer of vacuum during measurement. (kill the ignition... don't yank or pinch the vacuum tube(s) whilst the engine is running).

If you get bubbles in the capillaries:

1) remove the calibration plungers to allow all the glycerin to drain back into their reservoirs... let the rack sit overnight. DO NOT blow through the tops of the columns.

2) reinstall the calibration plungers being careful not to introduce atmosphere into the reservoirs.


Remember: the tolerance for induction vacuum measurement is +/- 10mm mercury... that's .1cm mercury. If your tool doesn't have the minimum resolution of 10mm/.1cm mercury then it's not accurate enough for this proceedure.


Yoshis!! GO NINJEE!!!

Fat chicks at Wal-Mart: NOT RECOMMENDED

Link | Top | Bottom

Grn14


Grn14's Gravatar

Location: Montana

Joined: 02/25/09

Posts: 15511

RE: how-to for throttle body sync?
10/07/15 7:52 PM

Good to know Hag...thanks..and you too Rook;)

Link | Top | Bottom

cruderudy


cruderudy's Gravatar

Location: AMR

Joined: 08/15/12

Posts: 1963

RE: how-to for throttle body sync?
10/07/15 8:39 PM

Sure is nice when smart people discuss and share important info like this ... thanks guys!


Perfectly Set up '06 dead and gone
New BBW '14 14R

Link | Top | Bottom

Rook


Rook's Gravatar

Joined: 03/28/09

Posts: 20592

RE: how-to for throttle body sync?
10/08/15 7:59 AM

That's an accurate description/explanation of the fluid accumulation in the tubes but avoiding the problem remains unresolved. Yes, you must entirely disassemble the whole damn thing to get the fluid drops out of the tubes and into the reservoir but that just starts the whole process over. By disassembling the tool, you eliminate the calibration you just completed. You recalibrate. You get fluid drops stuck in the tubes again...disassemble...recalibrate....fluid drops in tubes....disassemble.....recalibrate. I did this about 4-5 times and the problem seems to have gotten more pronounced.
[EDIT: shake down like a thermometer.]


The problem is rapid elimination of vacuum, indeed. The solution would be to reduce the vacuum more slowly so the fluid would drain back gradually. This would allow the fluid that clings to the sides of the tube to follow the main column of fluid and run back into the main column instead of breaking away from the main column and forming independent drops.

There is no way to shut the engine off gradually. It may be possible to dissipate the vacuum slowly some other way. If one could pull the calibration tube real fast and deftly slip a finger over the nipple, that would hold the vacuum and it could be released in steps by carefully releasing finger pressure on the nipple ( ). The same thing might be achieved with better results by using the calibration manifold (sorry those of you who are not familiar with the parts, no pics yet). The calibration manifold has 6 niples; 1 for the calibration tube which goes to the Tbody, 2,3,4,5 that go to the the four fluid tubes, 6 an unused nipple that is blocked with a cap (I guess it's there to link a second manometer if you have more than four cylinders). Let the engine run and slowly loosen the cap on the extra nipple. This should SLOWWWWLY reduce the vacuum. The fluid will drain back as slowly as you remove the cap. Now shut off engine, disconnect calibration manifold and connect hoses to manometer. I will try tonight. Wish me luck.
[EDIT: slowly removing the cap or the calibration hose from the calibration manifold of the SyncPro works sometimes. If not, do the thermometer wave.]


* Last updated by: Rook on 10/17/2015 @ 6:47 PM *


'08 MIDNIGHT SAPPHIRE BLUE Now Deceased

Link | Top | Bottom

piken


piken's Gravatar

Location: Phoenix, AZ

Joined: 08/27/15

Posts: 665

RE: how-to for throttle body sync?
10/08/15 5:21 PM

I'm new to the 14 and have always sync'd my bikes and
the 14 is on my to-do list, but after following this thread, maybe not.

I've always used the Morgan Carbtune. Didn't see it
mentioned so thought I'd throw it in there.

http://www.carbtune.com/

I'll be following this thread to see how this all turns out.

Link | Top | Bottom

Rook


Rook's Gravatar

Joined: 03/28/09

Posts: 20592

RE: how-to for throttle body sync?
10/08/15 7:10 PM

Thanks piken. looks like a British product. IDK how available it is in NA. If you say it works, I trust you. I haven't given up on manometers in general. I believe comparing tall columns of fluid would be more accurate than comparing little dial gauges. the manometer is probably the superior tool if it works easily.

Yes, it is pretty tricky to reach all the screws. There will be a complete illustrated tutorial when I get this done and I'll post the link on this thread. Getting the manometer to work has been half the process and I still think it will be a challenge to use the SyndPro even if I can get it calibrated.

No real time today to work on it but have new ideas:

I could use my mity-vac to calibrate instead of the bike's engine. With the mity-vac, it's probably possible to reduce the vacuum in small stages to prevent all the fluid from draining back too fast after the tool is calibrated.

Also, I wonder if the paler blue spots I am seeing in the fluid column are water contamination? Could be that forcing air pressure into the tubes to push the fluid drops back to the reservoir caused moisture to condense as the pressure was relieved? Hard to say for sure but I noticed that about the third try. I had only used the rubber caps on the ends of the tubes like eyedropper squeeze bulbs to push the fluid back at that point. that could not have produced much pressure. The turkey baster syringe was big time pressure (I'd say 10 lbs of thumb pressure on the plunger). Still no leakage at all from the valves or tube orings so we know those suckers seal really well.

I'm having a shot at the mity-vac calibration of the SyncPro tonight. Will post results tomorrow. Thanks for following. There really should have been a separate thread made about the use of the SyncPro but I had no idea it was going to be this complicated.


'08 MIDNIGHT SAPPHIRE BLUE Now Deceased

Link | Top | Bottom

Grn14


Grn14's Gravatar

Location: Montana

Joined: 02/25/09

Posts: 15511

RE: how-to for throttle body sync?
10/08/15 7:15 PM

"but I had no idea it was going to be this complicated"....

Link | Top | Bottom

Rook


Rook's Gravatar

Joined: 03/28/09

Posts: 20592

RE: how-to for throttle body sync?
10/08/15 7:23 PM

Well I did say the synpro has been half the battle and that is quite accurate, I believe. Once we get some pictures and explanations, it will be all laid out for the gen1 owners. It still will be a job. I can't say it will ever be easy or unintimidating to get a bit in that center screw that you can only see with a mirror.

The Gen2 owners don't have to worry about that center screw. It was not included on the Gen2 Tbodies...I'll bet because Kaw decided no one was going to fuss around trying to adjust it so just go with extra high capacity bypass valves and you got all you need to sync. Good idea.


'08 MIDNIGHT SAPPHIRE BLUE Now Deceased

Link | Top | Bottom

Rook


Rook's Gravatar

Joined: 03/28/09

Posts: 20592

RE: how-to for throttle body sync?
10/09/15 8:19 AM

The SyncPro instructions say to adjust the valves all the way in to make the fluid columns max height and shake the fluid down like a thermometer if air gets trapped in the tubes. Never tried that and that would be preferable to disassembly ...BUT if you need to adjust the valves all the way in to do this, your calibration would be shot. You'd be starting over again just the same as if you disassembled.

I succeeded in calibrating the SyncPro with my Mityvac. Lightly tapping the vacuum release lever on mityvac works great for gradually getting the fluid to run back to the reservoirs without forming drops in the tubes. I also tested removing the rubber cap from the extra fitting on the calibration manifold and that seemed to work even better for gradually releasing the vacuum. It should be possible to use this technique with the engine running so I have some hope this thing might be figured out.

I'm pretty sure the problem is being caused by condensed moisture in the tubes which is caused by changes in air pressure within the tool. A warm engine on a cool damp day also would contribute to the problem. The moisture does not completely integrate with the mano fluid and the water tends to collect on the insides of the tubes rather than run back to the reservoirs. There's no way around it. You might need to change the mano fluid every time you used the SyncPro to eliminate the moisture. I have no way of knowing what effect the water has on the calibration of the SyncPro. I assume any effect that water might have on the height of the fluid collumns is negligible since the SyncPro fluid is water based.


* Last updated by: Rook on 10/9/2015 @ 12:58 PM *


'08 MIDNIGHT SAPPHIRE BLUE Now Deceased

Link | Top | Bottom

VicThing


VicThing's Gravatar

Joined: 07/17/14

Posts: 2361

RE: how-to for throttle body sync?
10/09/15 5:40 PM

Rook just go with the guages you bought. You'll like them a lot better.


* Last updated by: VicThing on 10/9/2015 @ 5:42 PM *

Link | Top | Bottom

Rook


Rook's Gravatar

Joined: 03/28/09

Posts: 20592

RE: how-to for throttle body sync?
10/10/15 11:48 AM

The ABN gauges are on the way but I had some success using the SyncPro last night.

Shakedown Technique
The key to using the SyncPro is to shake any fluid drops that might form in the tubes down the same way you would with a thermometer. It is not necessary to open the fluid valves prior to shaking the fluid drops back to the reservoirs. Just disconnect the hoses from the SyncPro and whip it downward forcefully several times. The centrifugal force will pull all the fluid to the reservoirs without needing to change the calibration of the tool.

Gradual reduction of Vacuum
The drops in the tubes form when the engine is shut down and the fluid runs back to the resevoirs quickly. I shut the bike off after running briefly several times and had no problems with drops forming in the tubes. It seems like the drops in the tubes are more likely form when the tool has been used with the engine running for 5 minutes or more. I had luck slowly removing the calibration tube to reduce the vacuum in gradual steps. If this fails to prevent any drops from forming in the tubes, remove the hoses and use the shakedown technique.

Adjusting the Center Screw on the Gen1
Turning the center adjuster screw changes the angle of the throttle plates of the LH pair (1 and 2) and the RH pair (3 and 4). By turning the center screw clockwise, you open the plates to the RH pair. I turned the center adjuster about 75-80 degrees (less than a quarter turn) clockwise and this was enough to bring the highest vacuum of the RH pair up to the highest vacuum of the LH pair. This small turn seems to have only effected the RH pair, bringing both #3 and #4 up. The LH pair was not effected by the adjustment (which is good because I did not need to lower the left to increase the right). The highest vacuum of the LH pair is now equal to the highest vacuum of the RH pair. According to the service manual, the vacuum is now synchronized.

Turning the center adjuster screw clockwise or counterclockwise did not seem to effect vacuum in the LH pair but it did change vacuum in the RH pair. Perhaps if the center screw is turned far enough counterclockwise, it would effect the LH pair and not the right. I don't plan to mess with it any more than necessary so we may never know.

It is necessary to press the bit into the X slots of the center adjuster screw hard enough that the throttle will open. It is not unlikely that the rpm will increase considerably (to maybe to 4000). For this reason, I did my first adjustment of the center adjuster screw with the engine shut off to avoid high revving and possibly sucking up the manometer fluid. I did do some minor tweeks to the adjustment of the center screw with the motor running. To make small final changes in vacuum, you really barely need to move the screw.

It is not possible to see but the center adjuster screw is not perpendicular to the throttle bodies like the bypass screws are. The axis of the center screw is parallel to the ground so after inserting the point of the bit in the X, hold the driver so that the bit is at 0 degrees horizontal. This will be aligned to the axis of the screw and the bit will seat into the X best.

Using the Motion Pro Pilot Screwdriver
A 2" phillips bit that has a little smaller than average point is required to reach the center adjuster screw. The only place you will find that is in those screwdriver sets with interchangeable bits. A standard two inch #2 bit you might buy at the hardware store for a drill seems too large to fit the center adjuster screw. These interchangeable bits do not ordinarily have the spring ball bearing retainer that the tiny bits that come with the MP driver have. It's important that you wrap a band of tape around the head of the driver and the shaft of the bit to retain it if it does not have a ball retainer. You do not need to wind the tape round and round tightly, just so it forms a loose sheath around the shaft of the bit. This will allow both the bit and the gears of the driver to turn. I did not have a single problem with the bit falling out (and that could have been another small horrible nightmare).

The handle of the Motion Pro 90* angled screwdriver is equipped with a click stop mechanism for screw turning reference. The point of the bit may need to turn a liitle before it locks into the X or it may slip in the X. You may feel clicks but that doesn't mean the screw turned so you will need to remove the bit from the screw and observe the orientation of the X slots in the screw to determine how far it turned. As indicated previously, you will probably not need to turn the center screw very far off of its factory setting.

Improvement caused by the Service Manual Specified Process Vacuum Sync
So that was it according to the SM procedure for Tbody vacuum sync. The idle does seem to sound steadier instead of the occasional off balance lopey idle it had (which I think is sorta cool, BTW). the process I described above took about 90 minutes and the engine was shut off for most of that time. As often is the case, it's hard to tell if there was a big improvement. the engine was already running good. I will have a good listen today.

The SM does not specify tuning the two Tbodies that remain with lower vacuum. After all of this, I have to have a shot at it though. As it turned out, #2 and #3 are equal and highest. #1 is just a little lower than 2 and 3. #4 is way low. I will proceed with fine tuning the vacuums with the bypass screws today. I suspect I will need to readjust the center screw since #4 bypass seems to be open all the way and it is still has the weakest vacuum.

off to the gee-rage.


* Last updated by: Rook on 10/10/2015 @ 12:09 PM *


'08 MIDNIGHT SAPPHIRE BLUE Now Deceased

Link | Top | Bottom

Rook


Rook's Gravatar

Joined: 03/28/09

Posts: 20592

RE: how-to for throttle body sync?
10/10/15 11:52 AM

My ABN gauges came. Holy shit, they're HUGE! The whole unit is 16" across. Each gauge is 4" diameter. More on those later. I'm into the SyncPro now that I have it figured out.


'08 MIDNIGHT SAPPHIRE BLUE Now Deceased

Link | Top | Bottom

Rook


Rook's Gravatar

Joined: 03/28/09

Posts: 20592

RE: how-to for throttle body sync?
10/10/15 4:27 PM

Adjusting Bypass Screws
Oddly enough, turning the bypass screws clockwise (tightening) increases the vacuum, counterclockwise (loosening)decreases vacuum. I thought it would be exactly the opposite and spent a good deal of time turning a bypass the wrong way.

Bypass screws should NOT be hard to turn. If you're turning clockwise and the screw is hard to turn STOPIT! The screw is all the way to max bypass. You can't close the valve any further.

I found it helpful to draw a picture of the bypass screw showing changes in the slot orientation after every adjustment. By doing that, I was able to keep track of how much the bypass screws were turned. After all was said and done, I ended up tightening them all the way in anyway.

I adjusted both my #1 and #4 all the way in and that has brought me very close to a perfect balance. I will nudge the center adjuster one time to see if I can bring them all as close as possible to even but it looks close enough to me now.

I declare VICTORY over the vacuum sync! It is possible but if you never did one, it will take a lot more practicing with the tools and procedures than the actual time it takes to do the sync. Tutorial forthcoming. That should help anyone to get this done with a lot less hassle than it has caused me.

Tomorrow, I may play with my vacuum gauges to see how they compare to the manometer.


* Last updated by: Rook on 10/10/2015 @ 4:30 PM *


'08 MIDNIGHT SAPPHIRE BLUE Now Deceased

Link | Top | Bottom


Welcome to zx14ninjaform.com!
 
New Topic Reply
Next Page

Page: 1 2 3 4 5 6

Previous Page

New Post

Please login to post a response.