Move Close
Welcome to zx14ninjaform.com!

You are not logged in.
New Topic Reply
Next Page

Page: 1 2 3

Previous Page

Thread: Remove PAIR, Install blockoff plates

Created on: 06/26/11 12:29 AM

Replies: 64

Rook


Rook's Gravatar

Joined: 03/28/09

Posts: 20577

Remove PAIR, Install blockoff plates
06/26/11 12:29 AM

Gen1 PAIR Removal Blockoff Plates Installation

The mod saves 7.05 ounces, cleans up the engine bay as well as reducing decel popping. Having the PAIR removed or blocked also permits the use of an O2 sensor for tuning.

Do First:
Remove ram air covers, fuel tank fairing, right and left foremans, side fairings and right lower (Fairings Removal)

Remove fuel tank (Fuel Tank Removal steps 1-8).

Remove the right bulkhead door (see steps 1, 2 and 3, Bulkhead Door Removal).

Placing the bike on a rear stand will raise it enough to make work much easier. You will need a flashlight to see under the air box.

Tools
block off plates (I used Muzzy’s kit)
rear stand
flashlight
10mm socket
1 inch round end cap plugs or other object to block air box hole
sand paper
silicone spray
blue locktight
screwdriver
8mm socket
vacuum cleaner
1/4” or 3/8” drive ratchet
4mm hex tool socket
5mm hex tool socket
plastic bag
zip tie

Seal Clean Air Hose Grommet
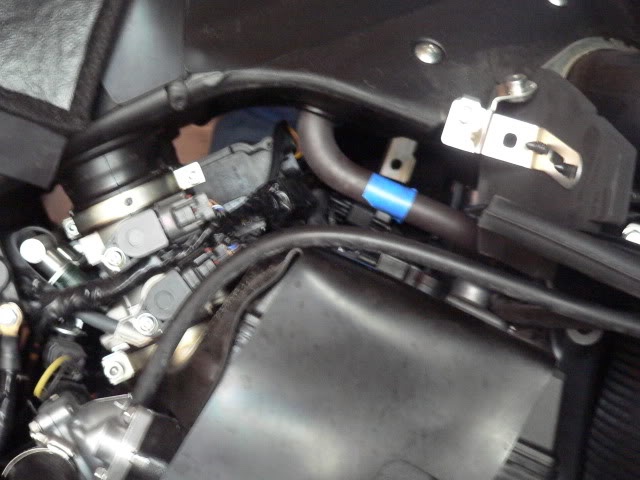
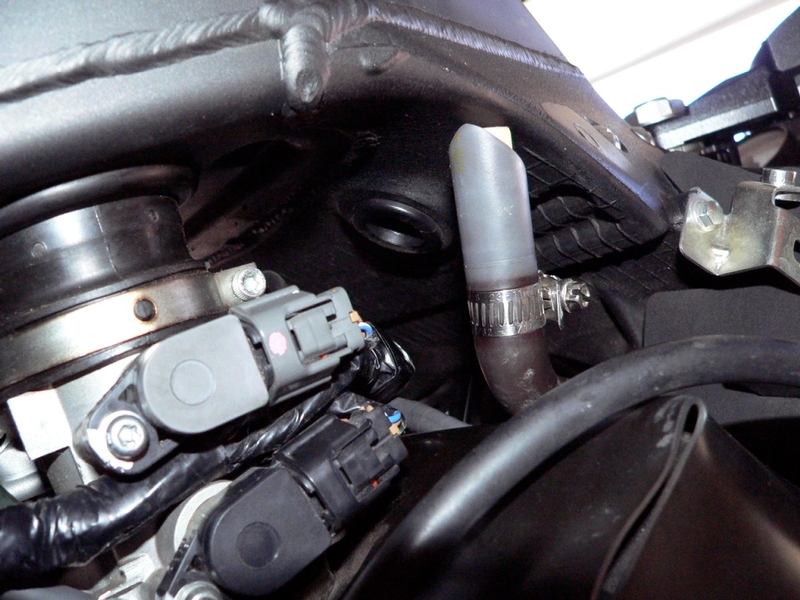
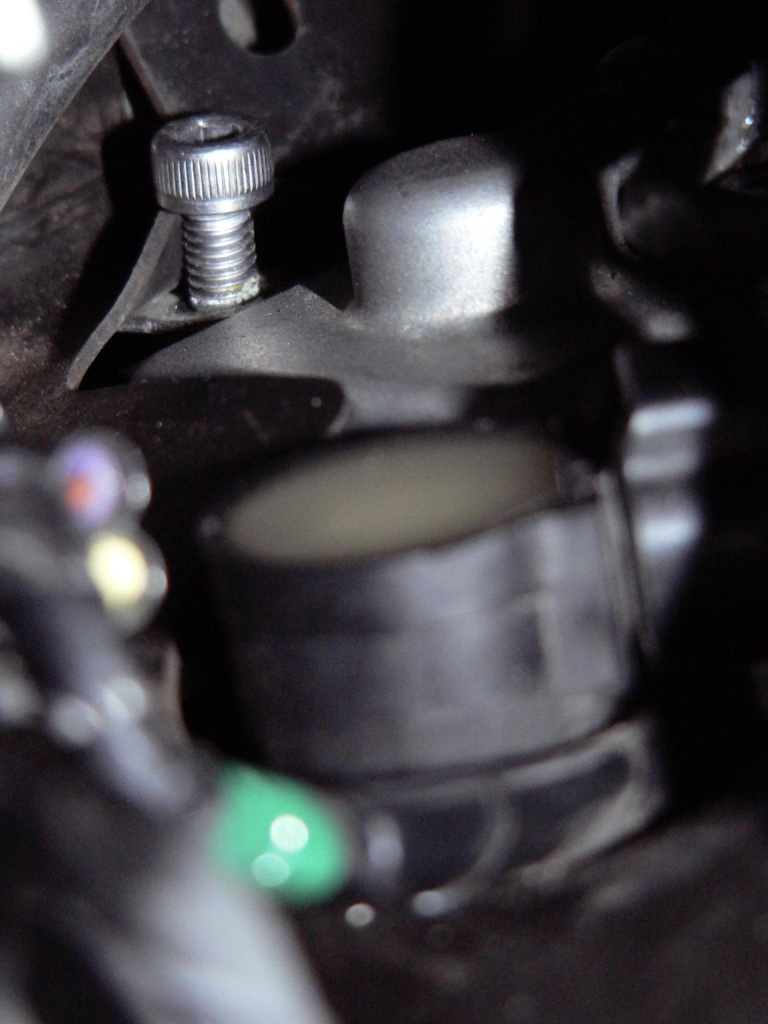
1. Pull the clean air hose from the grommet on the right underside of the air box. The second photo shows the grommet above the hose.

There is a hose clamp on my clean air hose from a previous PAIR block mod.


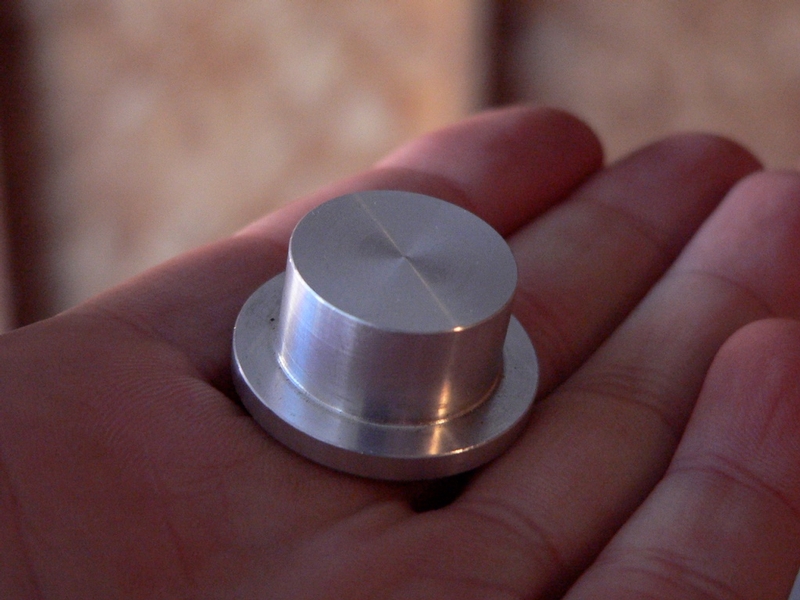
2. The clean air hose grommet will need to be securely blocked in some way. The Muzzy kit comes with a billet air box plug but it will not fit the grommet. If I had managed to force the plug in, I believe it would have caused damage to the grommet. As far as I can tell from the Service Manual parts fiche, the grommet is only available as a part of the air switch valve. Lowe’s has grommets but none were the right size.

EDIT: Thought this might be helpful so I lifted it from a post near the top of p2 of this thread. The tip was contributed by "beigs." Sounds amazing. If my lil plastic cap were not so lightweight, I'd give it a try.

Hey All...?New member here, I just wanted to say thanks for this post. I just installed the Muzzys set in 08 and this guide was a huge help.?I did want to mention one thing: On the air box plug, just as Rook said, it doesn't fit without possibly causing damage. So I tried an old mechanics trick that a friend taught me, I froze it. Put it in the freezer for just over 24 hours while I worked on other stuff on the bike. Freezing shrinks the aluminum...not a lot, just a very tiny amount, but it was enough that with a firm push, it slid right in, nice and snug. After it thawed and expanded, it was solid in the rubber fitting.?Hope this helps someone...?Thanks Again...

I came across some 1 inch round end cap plugs at Lowe’s. It worked very well after the outside diameter of the plug was reduced with sand paper held flat on the edge of a table top. As a finishing touch, the sanded plug was held close to a small flame to burn away the fuzz that turned up from sanding. I made the plugs ribbing about the same diameter as the Muzzy plug and used a little silicone spray on it. It snapped right into the hole like it fit the diameter and also locked onto thickness of the grommet perfectly.


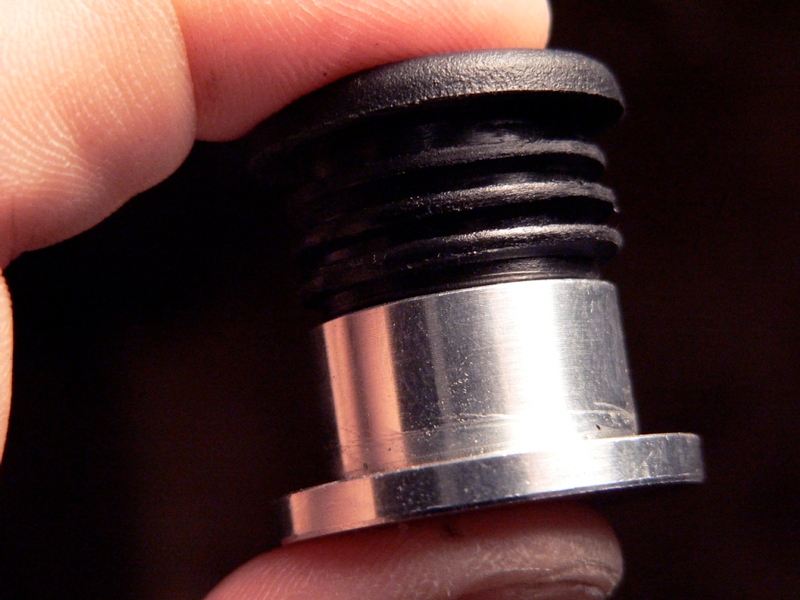
1” Plastic End cap with reduced ribbing to fit clean air hose grommet.


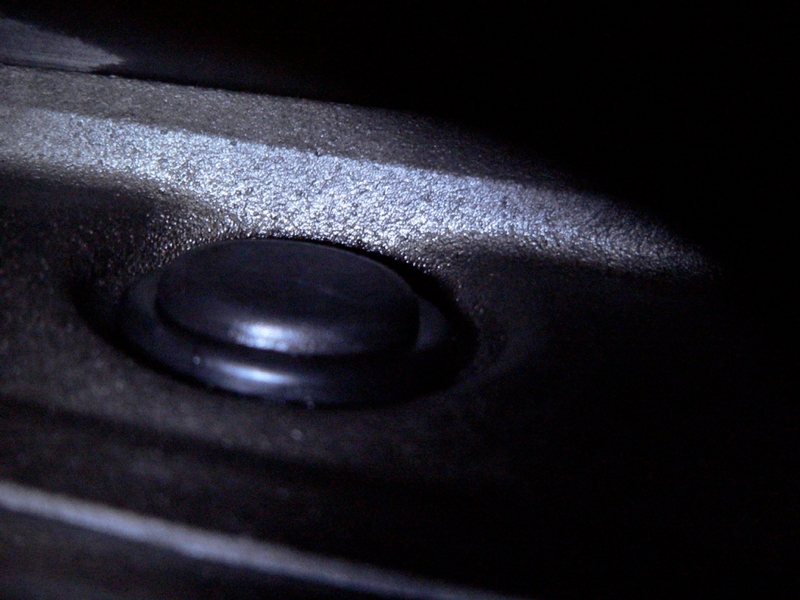
1” end cap grommet plug, air box interior.


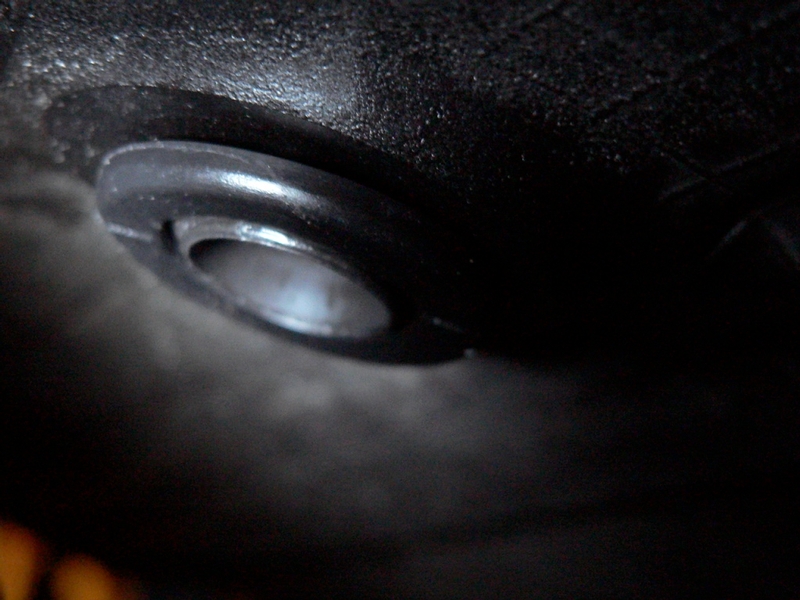
1” end cap grommet plug, air box exterior underside.

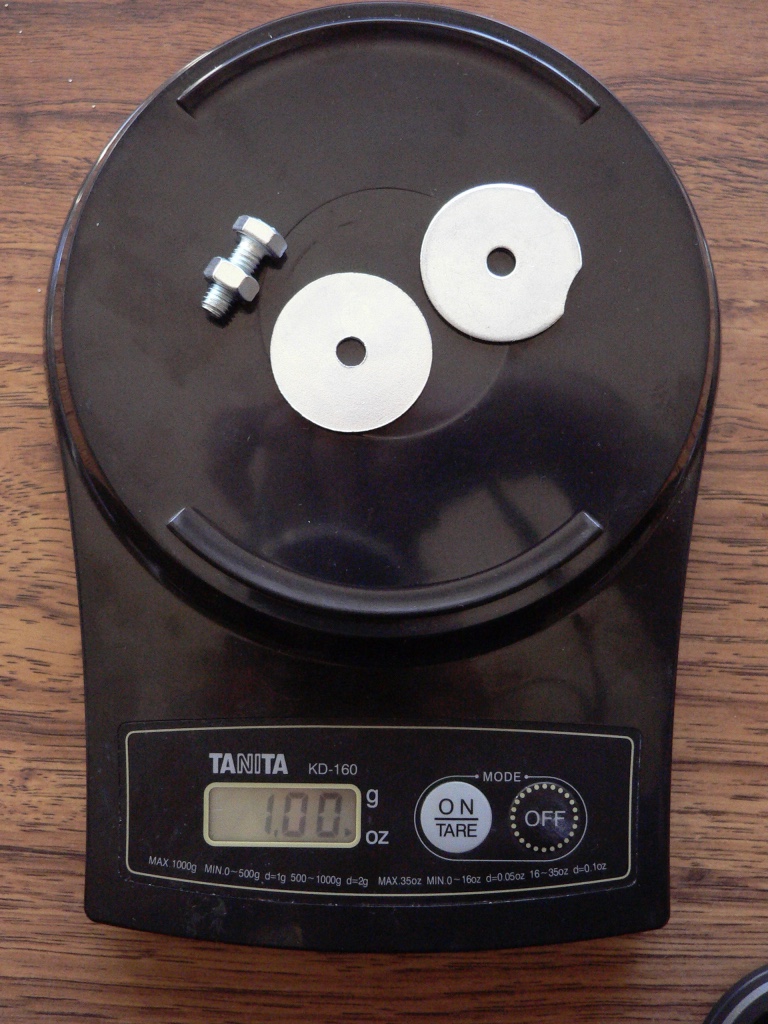
Another alternative would be to plug the hole with a couple of fender washers secured with a nut and small screw with locktight on the threads.


3. Position the RH bulkhead door over the access hole and put the bolts in finger tight.

Switch Valve Removal
4. Removing the side fairing hangers will make reaching into the tight spot under the air box easier.

Use an 8mm socket to remove the LH fairing hanger bolt so that it and the main wiring harness may be cleared.


LH side.

Use an 8 mm socket to remove the RH fairing hanger.


RH side.


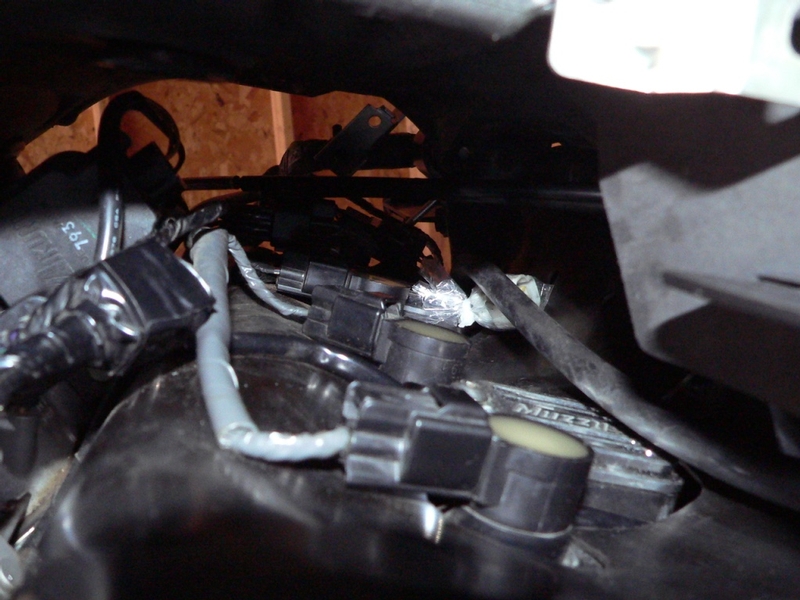
5. Locate the reed valve covers. They are the square, silver caps, each with a rubber hose running to the black plastic switch valve. The clean air hose from air box also attaches to the switch valve. You will need to lift the rubber mat and radiator overflow tube out of the way. I used a vacuum cleaner to clean around the covers before removing them so that no debris could fall into the reed valves.

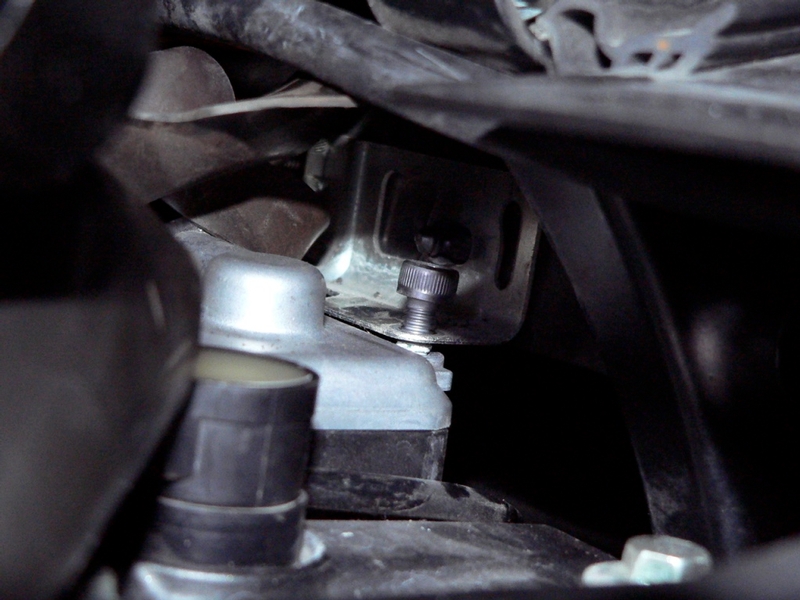
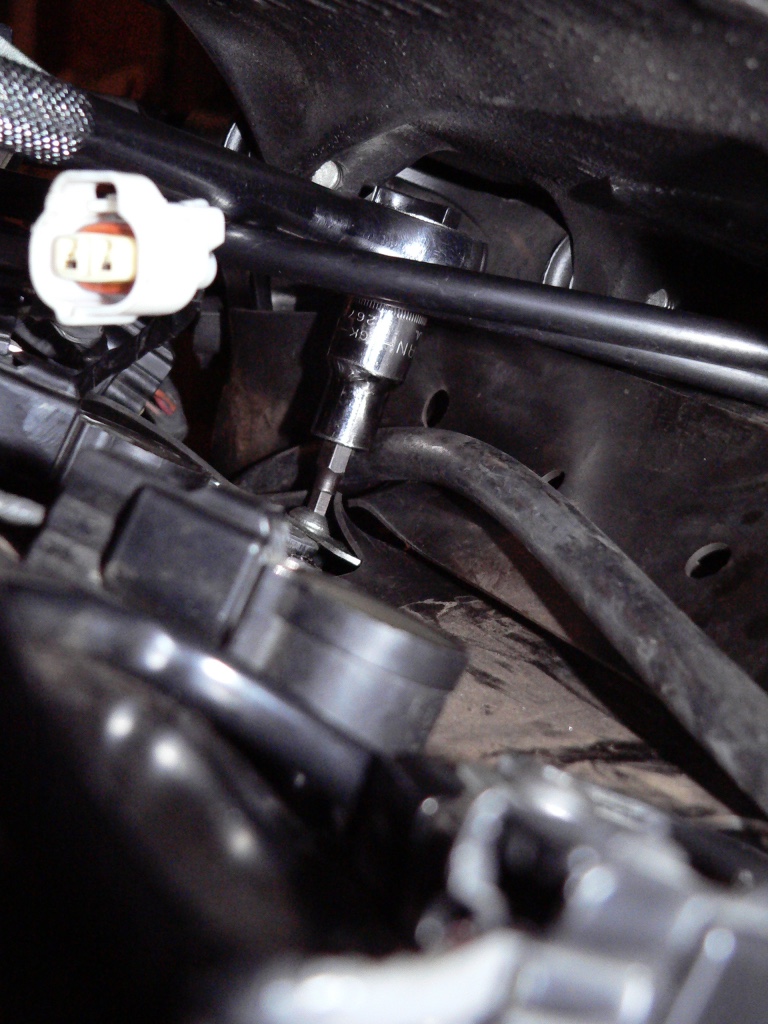
Use a 1/4” drive ratchet or 1/8” drive ratchet with a 5mm hex attachment to remove each reed valve cover screw.

A 3/8” drive ratchet will reach all four bolts if the handle of the tool is situated under the airbox and grasped from the opposite side of the bike.

Reach under the air box from the left with your ratchet to fit it on the right front screw. Position the handle of the ratchet under the air box rather than outside of the engine compartment (see step 8 of this tutorial).


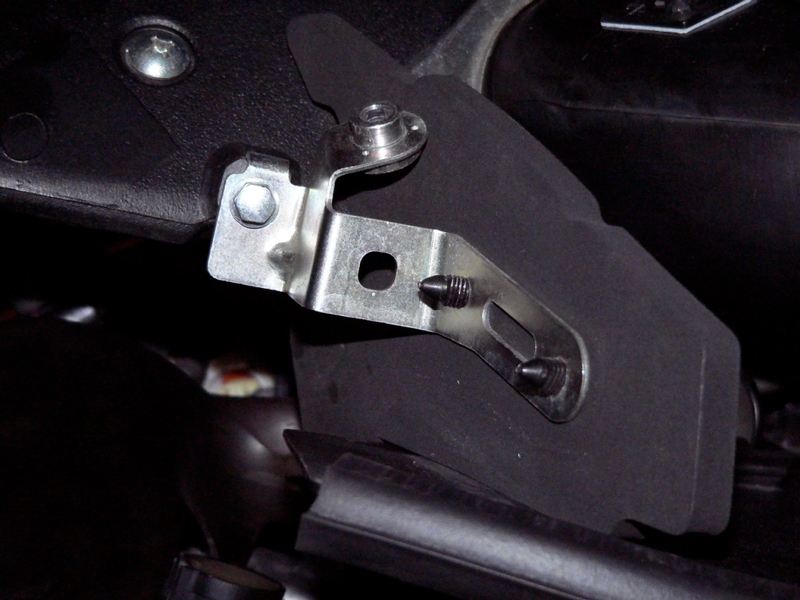
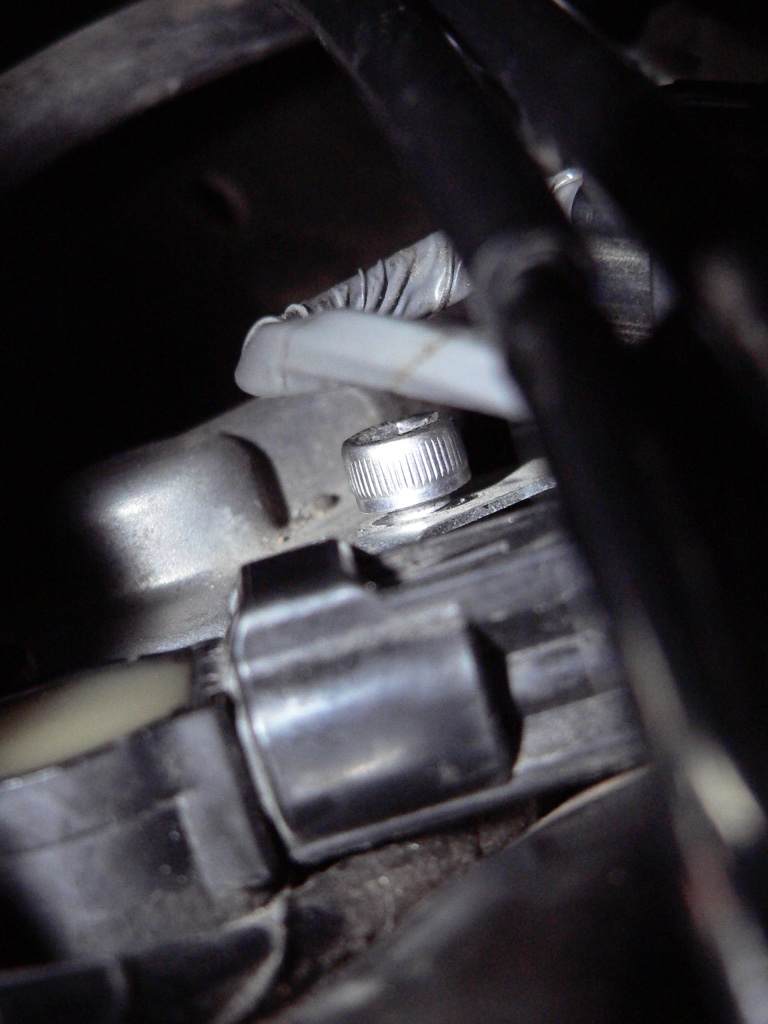
RH reed valve cover, rear bolt. This also fastens a retainer clip for the camshaft position sensor lead.


RH reed valve cover, front bolt. This also fastens the bracket for the heat shield wings which form part of the barrier between the top engine and the radiator .


LH reed valve cover, front bolt under rubber mat. This screw also fastens the heat shield wings bracket.


LH reed valve cover rear bolt. This bolt also fastens the bracket for the stick coils subharness lead connector.


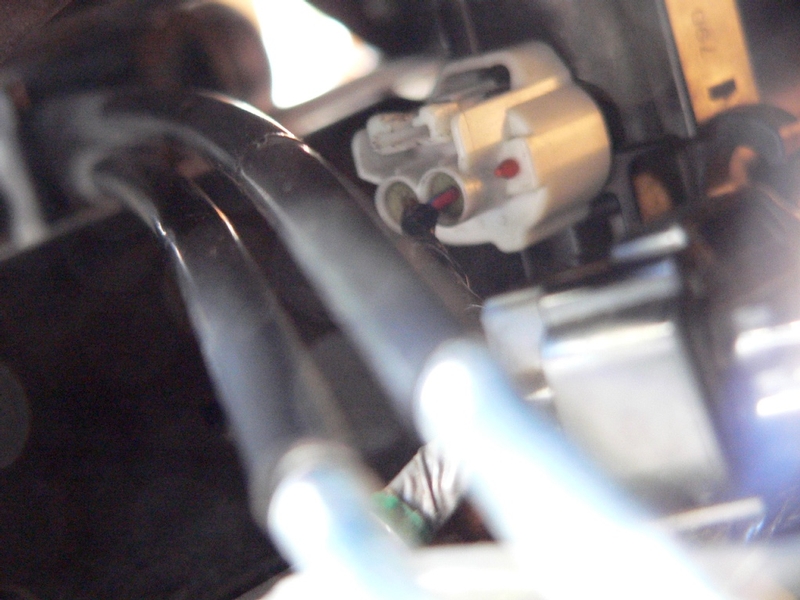
6. Remove the white clean air switch valve lead connector from the switch valve solenoid. Insert a screwdriver in the slot pressing the tab down to free the latch. Pull back at the same time.

I was able to disconnect the lead before the entire assembly was removed from the engine compartment but it was quite difficult. I would definitely try disconnecting the lead after the switch valve is free. You should be able to pull the entire assembly (switch valve, hoses, reed valve covers and connector) over to the left side of the bike to make disconnecting the lead easy. If the far left stick coil wire is disconnected, that should allow more slack in the switch valve lead which is routed under it. You could also remove the top engine wires and disconnect the switch valve lead after pulling the whole assembly out with the wire.


7. Pull the entire PAIR assembly out. I removed from the right because that side is unobstructed by throttle cables and allows easer access.

If you removed the connector in step 7 by pulling the whole assembly to the left, you might as well just pull it out of the left side.

Block-off Plate Install
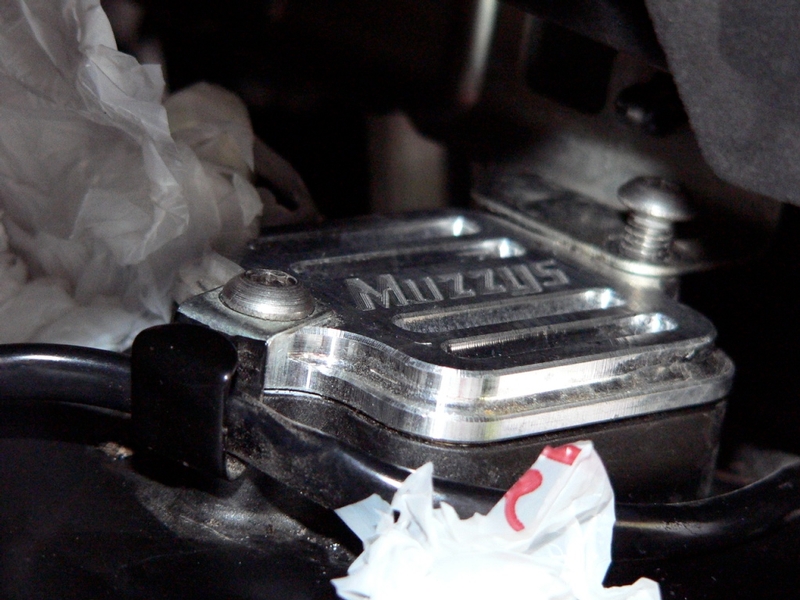
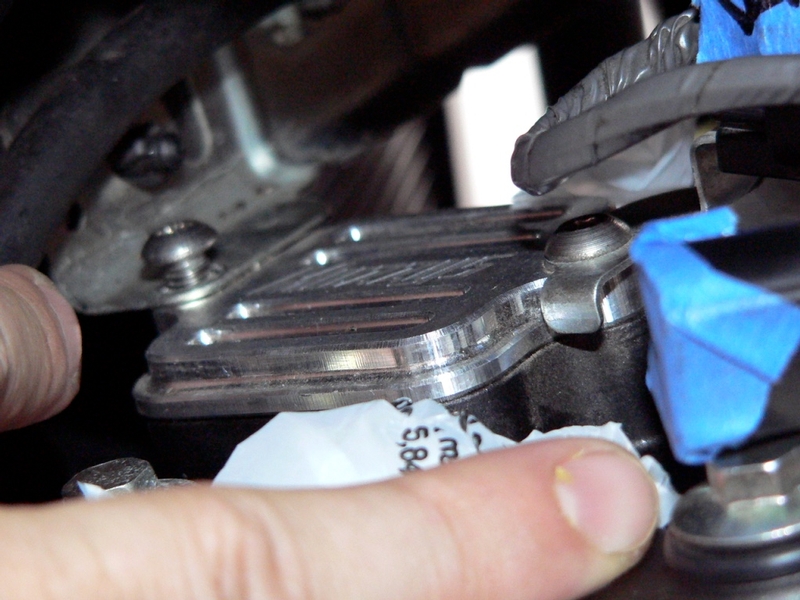
8. Each reed valve is a thin, metal plate located under the reed valve cover. Place a block-off plate over each reed valve opening leaving the reed valve permanently in place below it.

Use blue locktight on the threads of all four screws.

Fasten the camshaft sensor lead retainer to the rear bolt of the RH block off plate.

Fasten the stick coil sub harness lead connector bracket to the rear bolt of the LH block-off plate.

Torque - Reed Valve Cover Bolts: 87 inch lb.

The Muzzy kit has new screws included. which require a 4mm hex tool socket to install. I found these screws to be inadequate if you ever intend to remove them. The 4 mm allen hex and dome head will easily stretch or strip when breaking the bolts free. I reinstalled the OEM screws.


Tightening the front screw on left block off plate. A 3/8” drive ratchet with hex tool socket will fit on all screws if the tool is placed and used entirely under the airbox.


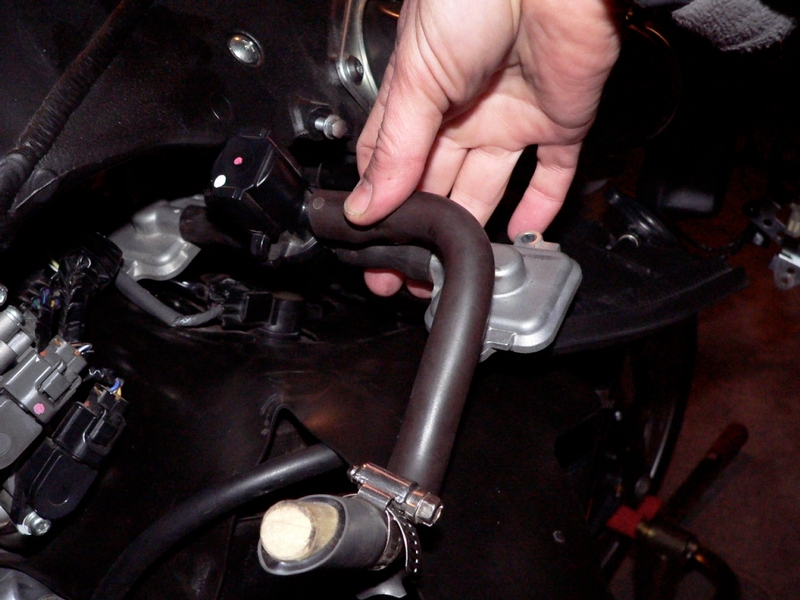
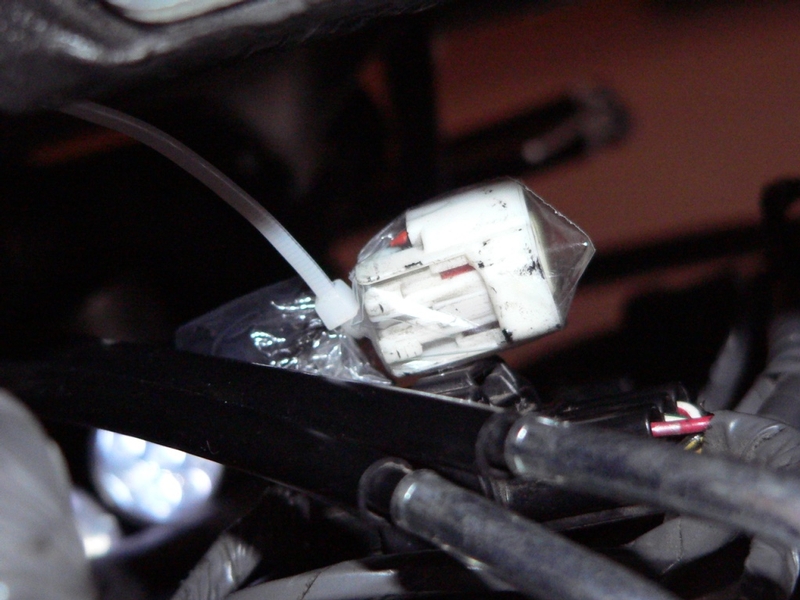
9. The final step is to protect the white lead removed from the switch valve in step 7 and place it under the radiator hose that crosses the front of the top engine. I used the corner of a plastic bag secured by a zip tie to wrap the lead and prevent dust accumulation.

Install ram air covers, fuel tank fairing, right and left foremans, side fairings and right lower (Fairings Removal).

Install fuel tank (Fuel Tank Removal, steps 9 through 14).

Install the right bulkhead door (see steps 4, 5 and 6, Bulkhead Door Removal).

Weights
Weight of switch valve with reed valve covers and OEM screws.

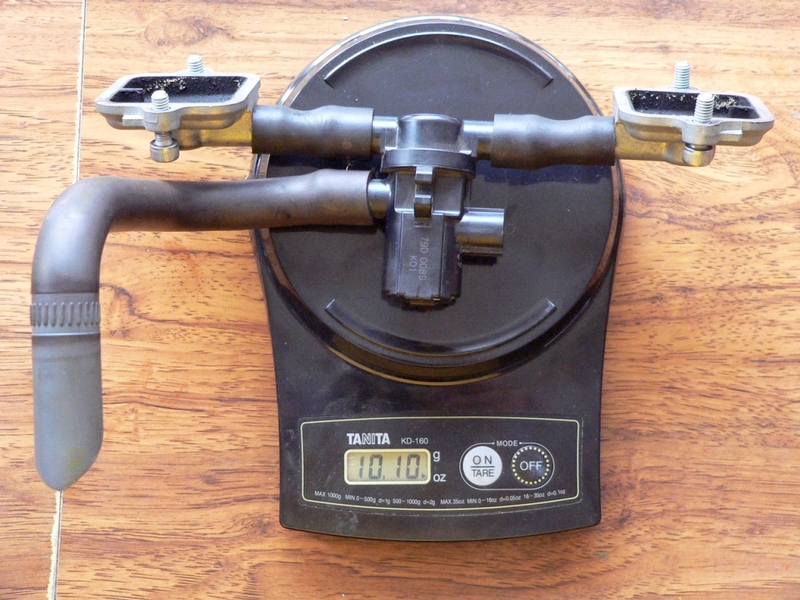
Weight of various air box plug solutions

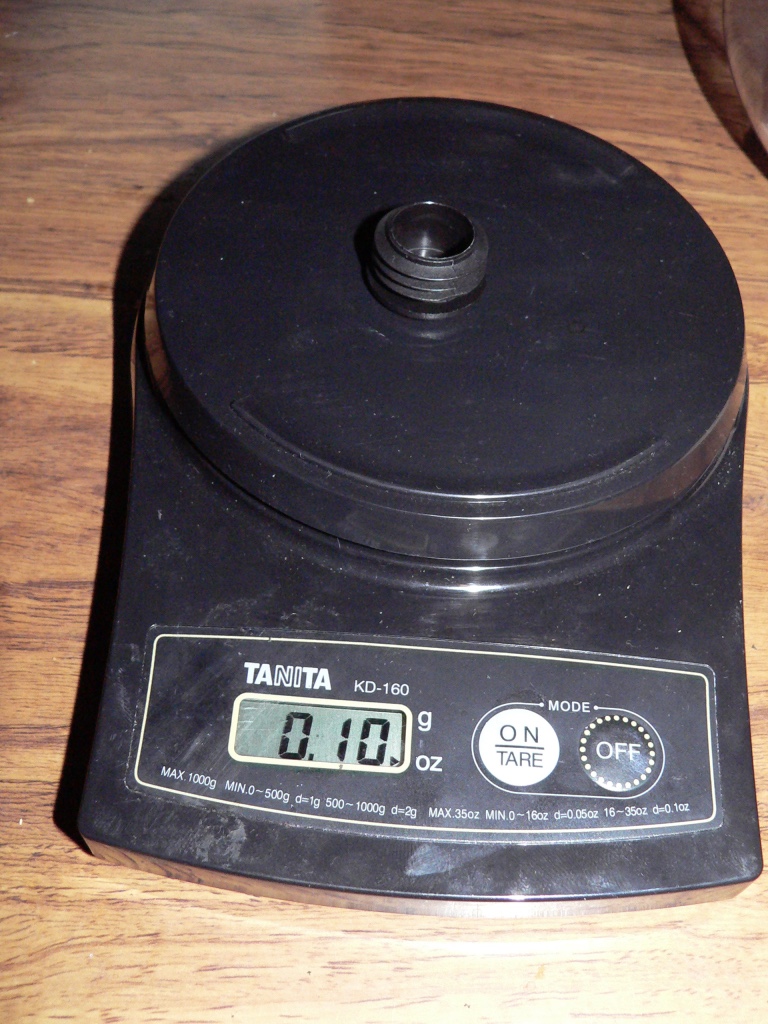
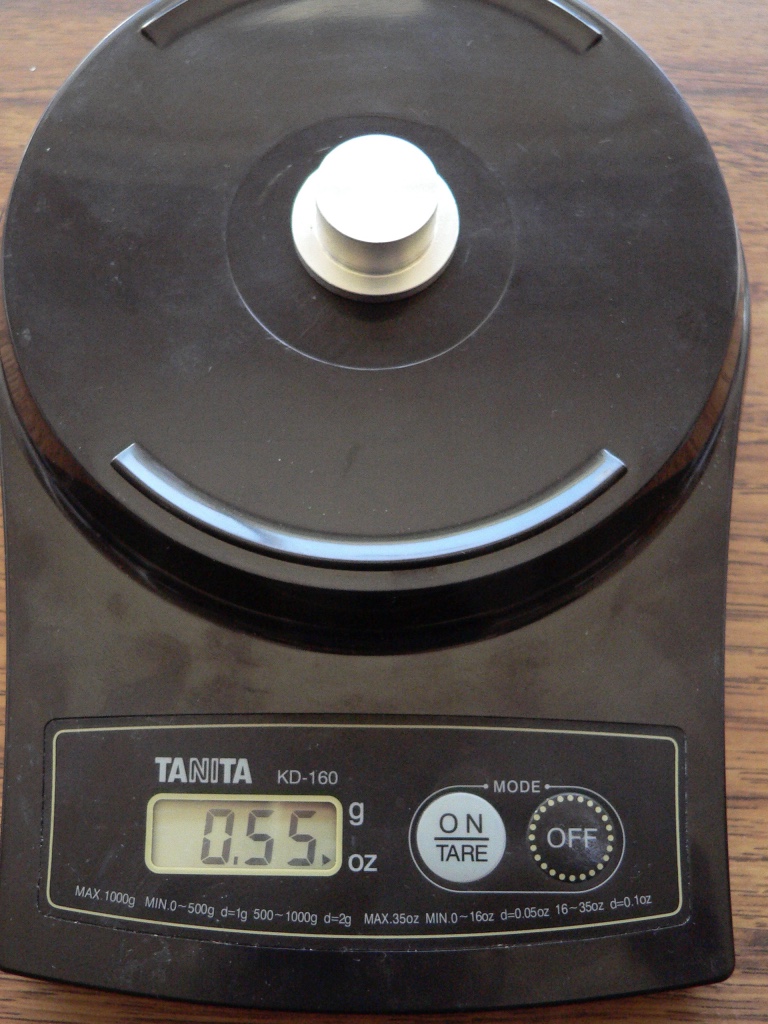
The weight of the entire Muzzys kit with clean air plug. Go with the endcap instead and you have 3.05 oz.


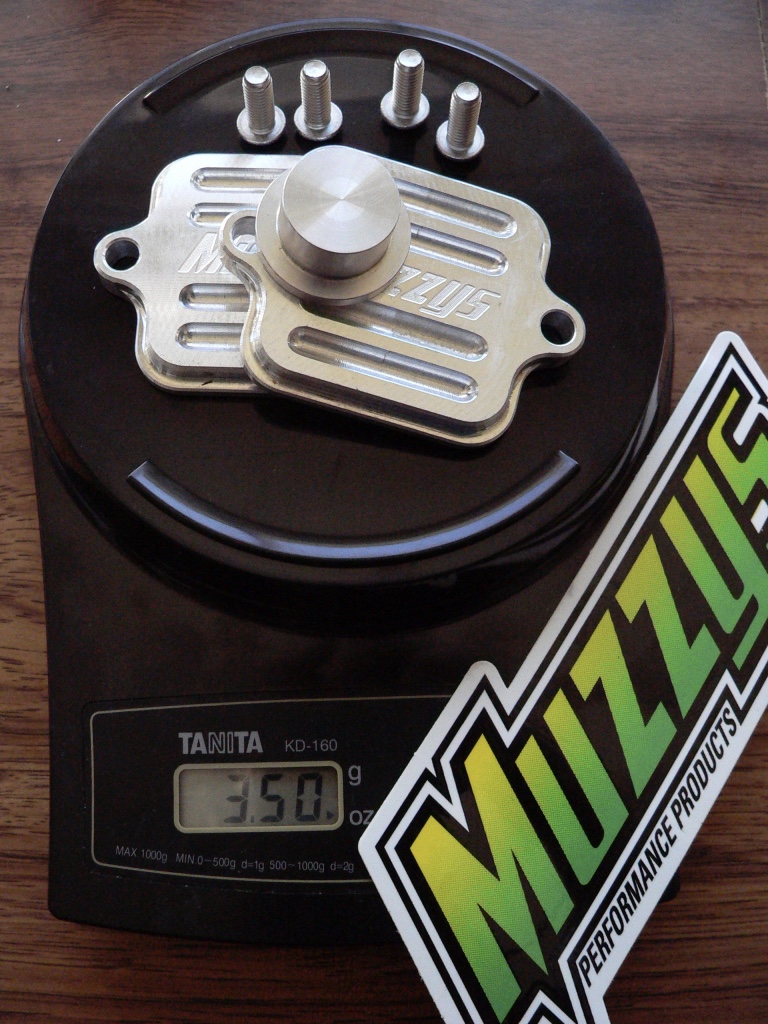
* Last updated by: Rook on 10/12/2017 @ 2:11 PM *


'08 MIDNIGHT SAPPHIRE BLUE Now Deceased

Link | Top | Bottom

bgordon

Forum Administrator

bgordon's Gravatar

Location:

Grand Junction, CO

Joined: 07/19/09

Posts: 1520

RE: Remove PAIR, Install blockoff plates
06/26/11 8:33 AM

Wow! GREAT job on this Rook! Thanks for taking the time... -bg

Link | Top | Bottom

Grn14


Grn14's Gravatar

Location: Montana

Joined: 02/25/09

Posts: 15511

RE: Remove PAIR, Install blockoff plates
06/26/11 10:30 AM

Another Killer How-To!Way to go Rookster!

Link | Top | Bottom

kdii02


kdii02's Gravatar

Joined: 12/08/10

Posts: 110

RE: Remove PAIR, Install blockoff plates
07/07/11 9:02 AM

Thanks for doing this Rook!!!


2010 ZX-14 Titanium/Black|HID 6000/5000K Low/Hi| LED City Lights| Integrated Turn Signal Tail light| K&N Filter| Muzzy Dual Stainless Oval Slip ons|PC-5|Cox Racing Radiator guard|Puig Windscreen

Link | Top | Bottom

Rook


Rook's Gravatar

Joined: 03/28/09

Posts: 20577

RE: Remove PAIR, Install blockoff plates
07/07/11 5:22 PM

My pleasure.


'08 MIDNIGHT SAPPHIRE BLUE Now Deceased

Link | Top | Bottom

CanTour


CanTour's Gravatar

Joined: 02/11/11

Posts: 27

RE: Remove PAIR, Install blockoff plates
01/06/12 10:07 PM

I concur: nice work Rook!

Link | Top | Bottom

Danno


Danno's Gravatar

Location:

Southwestern Illinois

Joined: 12/18/11

Posts: 2142

RE: Remove PAIR, Install blockoff plates
01/07/12 5:36 AM

A very thorough and comprehensive how-to! I don't know yet if this has already been done to my bike, but comparing to the first photo will tell instantly. I might do what I did on the ZZR 1200, which was to leave the reed valve covers in place and just remove the stuff in between while connecting them together with a piece of hose. The airbox plug tip is great. Wonder why the Muzzy plug is the wrong size?


* Last updated by: Danno on 1/7/2012 @ 5:37 AM *


'07 CPB Blue; ZGST windscreen with MRA X-screen adjustable spoiler, tube bar adaptor, PC III, ATRE,BMC air filter, modified stock seat with 2nd Look cover,Scorpion Flame Ti slip-ons, Galfer rotors front and rear, braided-stainless lines, C-F 10R front fender, C-F hugger, C-F inner fairing panels, painted foreman's fins with faux C-F inlay, polished rim lips wired for heated gear and accessories, Givi V35 side bags and E41 topcase with SW-Motech qd mounts

Link | Top | Bottom

seno


seno's Gravatar

Location: Lithia, Florida

Joined: 08/31/11

Posts: 592

RE: Remove PAIR, Install blockoff plates
01/07/12 5:36 AM

Nicely done. Not aplicable for the 14R though, much tighter.


2015 30th Anniversary Edition 14R #250-> Brock's CT Ceramic Coated, Ivan's ECU Flash V2 & Map, Block off plates, HM Strain gauge quickshifter, GPR Damper, Spiegler lines, Muzzy's Sliders, Pazzo levers, Rizoma Next Fluid Tanks, DDM Ultra 5500K HID's Low & Hi, DB Windscreen, Cox Radiator guard, gold titanium bolts... too many to list at this point

Link | Top | Bottom

Rook


Rook's Gravatar

Joined: 03/28/09

Posts: 20577

RE: Remove PAIR, Install blockoff plates
01/08/12 11:05 PM

tighter? damn- We will need some midget mechanics armed with tiny pneumatic tools!


'08 MIDNIGHT SAPPHIRE BLUE Now Deceased

Link | Top | Bottom

Rook


Rook's Gravatar

Joined: 03/28/09

Posts: 20577

RE: Remove PAIR, Install blockoff plates
01/08/12 11:14 PM

Thanks CanTour and Danno.

I might do what I did on the ZZR 1200, which was to leave the reed valve covers in place and just remove the stuff in between while connecting them together with a piece of hose.

That works just as well, I'm sure. It seemed awfully tough to get those hoses off under there but what really made me go to BO plates was that I just like to look at them when the motor is uncovered.

Wonder why the Muzzy plug is the wrong size?

I wonder if that has to do with some kind of change they did to the Gen 2. Maybe the plug fits an 06-07? Well, it wouldn't go in my 08. I'm sure I could have dremmeled it down a bit and it would have worked but that seemed like a lot more work than it was worth. Plastic is a lot easier to work with.


'08 MIDNIGHT SAPPHIRE BLUE Now Deceased

Link | Top | Bottom

scottjkyl


scottjkyl's Gravatar

Location: east jordan,mi

Joined: 06/26/09

Posts: 1851

RE: Remove PAIR, Install blockoff plates
04/23/12 3:35 PM

Rook nice how to... But I did my buddys 14 yesterday and for reasons I won't go into detail on I did the total pair removal from the right side of the bike and surprisingly it took less than an hr (not counting time for the fairing removal) once I got the right side bolts out I was able to pull out the entire pair system minus the the left side cover and once it was out there was all kinds of room in there and left side came out really easy (faster than it would of took me to dismantle the left side just to get to it) the only things i removed was that lil heat shield that the fairing and tank cover sit on and the top small radiator hose that runs across to the overflow bottle.


08 zx14se Brocks CT Duals, Brocks street map, Driven 16/43 sprockets,EK ZZZ Chain,MRA Windscreen, Roaring Toyz Diamond Cut Grips Pingel Elec shifter, Hyper-Pro RSC Damper, BlackChrome Wheels, Sargent Seat,Factory Pro Velocity Stacks,PCIII USB,Bonneville Pro, TPX Radar/Laser Detector, TPX Laser Jammer, Goodridge Shadow series braided lines front and rear, Rifleman 1/5 turn throttle, Fusion LED Stage IV Kit, DDM HID's 10,000k

Link | Top | Bottom

Rook


Rook's Gravatar

Joined: 03/28/09

Posts: 20577

RE: Remove PAIR, Install blockoff plates
04/23/12 10:08 PM

Only two reasons I suggest going into the left side is to get at the left reed valve cover. The left front screws are pretty hard to get at from the right unless you are familiar with the top of the motor. Also the white connector to the switch valve is extremely difficult to unsnap unless you pull the whole PAIR over the the left a bit. If you know how it all goes together, I would suggest just work from the right and avoid the throttle cables and the left side sub frame member. Then again, if you know how it all goes together, you prolly ain't reading this how too. LOL

Interesting approach you took. No reason to not try it, the hoses just slide onto the fittings on the reed valve covers. You can just pull the sections apart. ONly problem I see is that although those hoses slide together, they are really tight. I'd rather just take it all out rather than yank on it to dismantle the part s while in the bike. I'm kind of delicate with stuff though. I've heard of people doing PAIR block offs by just grabbing the switch valve and yanking it off the reed valve covers. Then they connect a short piece of hose between the fittings on the covers. No block off plates necessary. I couldn't see grabbing a holt of that thing and wrastling it out of there but that's just me. I'ma gentle surgeon.....but you're prolly much faster which is just as important.


'08 MIDNIGHT SAPPHIRE BLUE Now Deceased

Link | Top | Bottom

scottjkyl


scottjkyl's Gravatar

Location: east jordan,mi

Joined: 06/26/09

Posts: 1851

RE: Remove PAIR, Install blockoff plates
04/24/12 5:11 AM

Then again, if you know how it all goes together, you prolly ain't reading this how too. LOL

lol quite the opposite rook I read and studied your how to here several times before starting this job. You make me sound like a barbarian lmao there was no yanking shit out once the right side was loose I just gave it a lil twist and it slid right off. And the plug I was surprised at how easy it came off also.

Yes the front bolts on both sides are the toughest only cuz that rubber mat in there sits on top of them the right side I was able to tuck it down in front of the bolt the left side I had to keep pushing it back with the allen wrench until I got the bolt up over it.

when i do my bike I will take the left side apart also because I've got the dreaded valve cover leak I need to fix at the same time. Thanks for taking the tim to do these How-To's they are very helpful to us all.


08 zx14se Brocks CT Duals, Brocks street map, Driven 16/43 sprockets,EK ZZZ Chain,MRA Windscreen, Roaring Toyz Diamond Cut Grips Pingel Elec shifter, Hyper-Pro RSC Damper, BlackChrome Wheels, Sargent Seat,Factory Pro Velocity Stacks,PCIII USB,Bonneville Pro, TPX Radar/Laser Detector, TPX Laser Jammer, Goodridge Shadow series braided lines front and rear, Rifleman 1/5 turn throttle, Fusion LED Stage IV Kit, DDM HID's 10,000k

Link | Top | Bottom

Rook


Rook's Gravatar

Joined: 03/28/09

Posts: 20577

RE: Remove PAIR, Install blockoff plates
04/24/12 10:02 AM

...Thanks for reading them, Scotty!


Wow my tubes must have been extra tight for some reason, I tried pulling them off the switch valve while still in the bike and I couldn't do it. It would seem a lot easier if one cap was removed like you did it. I just gave up and took the whole thing out.

Your description of the front bolt/mat situation sounds the same as my experience. I'm glad to have that mat out of there. If you want to check with Smokin at bikeland zx14.com, he said he had a few of those mats laying around. You could just cut the one you have on there off and have a backup for a small price or maybe Smokin would just charge you delivery ...? I took mine off whole but that is only possible by removing the T-bodies.

AFA the dreaded valve cover gasket leak, mine is now A-ok!! It did continue to seep a tiny bit for some time while I used it in late Fall. but after the winter storage, nothing running down at all.


'08 MIDNIGHT SAPPHIRE BLUE Now Deceased

Link | Top | Bottom

scottjkyl


scottjkyl's Gravatar

Location: east jordan,mi

Joined: 06/26/09

Posts: 1851

RE: Remove PAIR, Install blockoff plates
05/06/12 4:52 PM

rook I pulled the pair on my bike this weekend and I swear it was easier than th 07 i did a couple weeks ago cause i was able to use a rachet on all 4 bolts the rachet would not fit in the 07 just waiting for my block off plates to get here.

Rook what is the purpose of leaving the reeds in?


08 zx14se Brocks CT Duals, Brocks street map, Driven 16/43 sprockets,EK ZZZ Chain,MRA Windscreen, Roaring Toyz Diamond Cut Grips Pingel Elec shifter, Hyper-Pro RSC Damper, BlackChrome Wheels, Sargent Seat,Factory Pro Velocity Stacks,PCIII USB,Bonneville Pro, TPX Radar/Laser Detector, TPX Laser Jammer, Goodridge Shadow series braided lines front and rear, Rifleman 1/5 turn throttle, Fusion LED Stage IV Kit, DDM HID's 10,000k

Link | Top | Bottom

Rook


Rook's Gravatar

Joined: 03/28/09

Posts: 20577

RE: Remove PAIR, Install blockoff plates
05/06/12 7:21 PM

rook I pulled the pair on my bike this weekend and I swear it was easier than th 07 i did a couple weeks ago cause i was able to use a rachet on all 4 bolts the rachet would not fit in the 07

Maybe you have a shorter socket? Or maybe you are putting the whole ratchet, handle and all, under the airbox. That is the only way I could get my ratchet and socket to fit. I just had to stick my hand in there and ratchet under the air box.. Mine is an 08 like yours.

Rook what is the purpose of leaving the reeds in?

IDK? That is what Muzzy says to do so I did it. Shit, I could have lost another tenth of an ounce if I would have left those out!

...maybe they act as a gasket and help seal the plates? IDK...i guess I wondered the same thing.


'08 MIDNIGHT SAPPHIRE BLUE Now Deceased

Link | Top | Bottom

bentz69


Location: Long Island

Joined: 04/07/12

Posts: 50

RE: Remove PAIR, Install blockoff plates
05/12/12 3:42 PM

great write up. did the install with the ebay block off plates for 18$ and it comes with a rubber plug/grommet for the airbox that fits perfectly

i have the two bros slip ons with a 06 catless header. all the gargeling ( if that makes sense) is gone bit i still get a loud pop around 3800 here and there. the pop is actually louder now then before.

exhaust note does sound better without the gargeling


2011 zx14

Link | Top | Bottom

Rook


Rook's Gravatar

Joined: 03/28/09

Posts: 20577

RE: Remove PAIR, Install blockoff plates
05/13/12 1:44 AM

I think I know what you mean by the gargle. That was the rumble of little back to back pops on decel. I actually liked that but he biggy at ~3.5K was the one I couldn't live with. I am able to control that with throttle now if i want. I know exactly when it is going to happen.


'08 MIDNIGHT SAPPHIRE BLUE Now Deceased

Link | Top | Bottom

dericrey


dericrey's Gravatar

Location: Vidor, Texas

Joined: 04/04/12

Posts: 256

RE: Remove PAIR, Install blockoff plates
07/01/12 7:34 PM

OK, Just to be clear. Is there any difference in the disabling of the PAIR system by installing block off plates or just using the hose blocking method? Besides the weight loss and clean up of the engine bay.


2009 ZX-14
Semper Fidelis
Kill 'em all, let God sort 'em out.
Violence Solves Everything.

Link | Top | Bottom

Rook


Rook's Gravatar

Joined: 03/28/09

Posts: 20577

RE: Remove PAIR, Install blockoff plates
07/01/12 9:55 PM

Both methods of PAIR blocking will achieve the same result. I ran mine with the clean air hose blocked for about 1 year. worked same as complete removal. Either way, the PAIR is not sucking clean air into the exhaust as it does when the PAIR is functioning. The complete removal and installation of block off plates is just for weight loss and is a very nice engine tidy too but blocking the hose is a lot quicker. Nice thing to do to try. You can always install bo plates some day in the future if you want.


'08 MIDNIGHT SAPPHIRE BLUE Now Deceased

Link | Top | Bottom

dericrey


dericrey's Gravatar

Location: Vidor, Texas

Joined: 04/04/12

Posts: 256

RE: Remove PAIR, Install blockoff plates
07/03/12 9:36 PM

Thank you for the "how to" section. I appreciate the time and effort. It helps speed up the learning curve for a newb like me. I used the hose block off method. Did anyone notice a slight decrease in idle rpm after disabling PAIR?


2009 ZX-14
Semper Fidelis
Kill 'em all, let God sort 'em out.
Violence Solves Everything.

Link | Top | Bottom

Rook


Rook's Gravatar

Joined: 03/28/09

Posts: 20577

RE: Remove PAIR, Install blockoff plates
07/06/12 5:57 AM

No, I do not think I did notice the idle drop but it is very possible that you bumped the idle speed adjuster knob on the lower left side of the bike. I have done that a few times. Just a simple turn of the knob to get it where you like it. I go for about 1000 rpm idle.


'08 MIDNIGHT SAPPHIRE BLUE Now Deceased

Link | Top | Bottom

audioboyz


audioboyz's Gravatar

Location: Washington,Pa

Joined: 03/25/12

Posts: 531

RE: Remove PAIR, Install blockoff plates
09/02/12 2:35 PM

Did mine a few weeks ago with I vans kit.In included a treaded orange plastic plug.It was a little tight with a square to tighten with.Used a crescent wrench till it was flush.I took a big screw driver and hit the cam side and just yanked it all to I fell on my butt.I didn't plug my connecter like you suggested.Rode it a couple hundred miles and today when I went to the garage a BIG FI light started flashing.Could it be the connecter?I'm confused.
Craig


Kawasaki is the worlds guardian of high performance 09 ZX-14 Monster Edition,Brocks Alienhead,PCV,-1 front sprocket, 43 Vortex rear sprocket,Speedo DRD speed calibration device,CF Ram Air Tube Covers

flies out,Zero Gravity tall smoked,LSL handlebar kit,K&;N Filter Concours seat,pollution block off plates installed,Dynotuned 175HP 104FT LB's TQ

2011 Mustang GT 6-Speed 5.0

Link | Top | Bottom

Grn14


Grn14's Gravatar

Location: Montana

Joined: 02/25/09

Posts: 15511

RE: Remove PAIR, Install blockoff plates
09/02/12 3:00 PM

Look in your service manual for the codes...DFI section.OR....turn ignition on...note the FI error display...push BOTH buttons for 2 seconds...it will display a code #.You'll find it in your manual...or online I suppose?

Link | Top | Bottom

audioboyz


audioboyz's Gravatar

Location: Washington,Pa

Joined: 03/25/12

Posts: 531

RE: Remove PAIR, Install blockoff plates
09/03/12 12:07 AM

Help me Rook.Im drowning.
Craig


Kawasaki is the worlds guardian of high performance 09 ZX-14 Monster Edition,Brocks Alienhead,PCV,-1 front sprocket, 43 Vortex rear sprocket,Speedo DRD speed calibration device,CF Ram Air Tube Covers

flies out,Zero Gravity tall smoked,LSL handlebar kit,K&;N Filter Concours seat,pollution block off plates installed,Dynotuned 175HP 104FT LB's TQ

2011 Mustang GT 6-Speed 5.0

Link | Top | Bottom


Welcome to zx14ninjaform.com!
 
New Topic Reply
Next Page

Page: 1 2 3

Previous Page

New Post

Please login to post a response.